Phillips SHB7000 headset charging port repair / enhancement
Phillips SHB7000 headset charging port repair / enhancement
My brother recently purchased a pair of new Phillips SHB7000 wireless headset online. About 5 minutes after openning the box, he dropped it from a negligeable height (about 2 feet)while it was charging. It broke before it could even use it. The micro-usb B charging port solder joint gave in and the plug got pushed inside the headset. Now, I am not sure why company still insist on using micro-usb B as charging port on everything because those things always break. It is a very fragile port because of the very small surface available for the solder. The sellers had gladly agreed to exchange them even after we told him it was basicly broke by our own accident but the price shipping them back would have made it more of a loss than anything so he came to me to check if I could do anything. After figuring out how to open the damn thing (no screws or instructions online on dissabling it), I found out exactly what I was expecting. The trace got torn off the PCB. While I was still able to resolder it back into places, it broke again right after I was done re-assembling the headset. I decided that the best course of action was to do what the Phillips engineer shoudl have done in the beginning and replace the flimsy micro-usb port with a barrel type DC connector. This way, we would kill two birds with one stone, repair the broken headset and fix the original design flaw. Now this is obviously a very straightforward repair, one that doesn't really require a tutorial but I figured it might help someone facing the same issue.
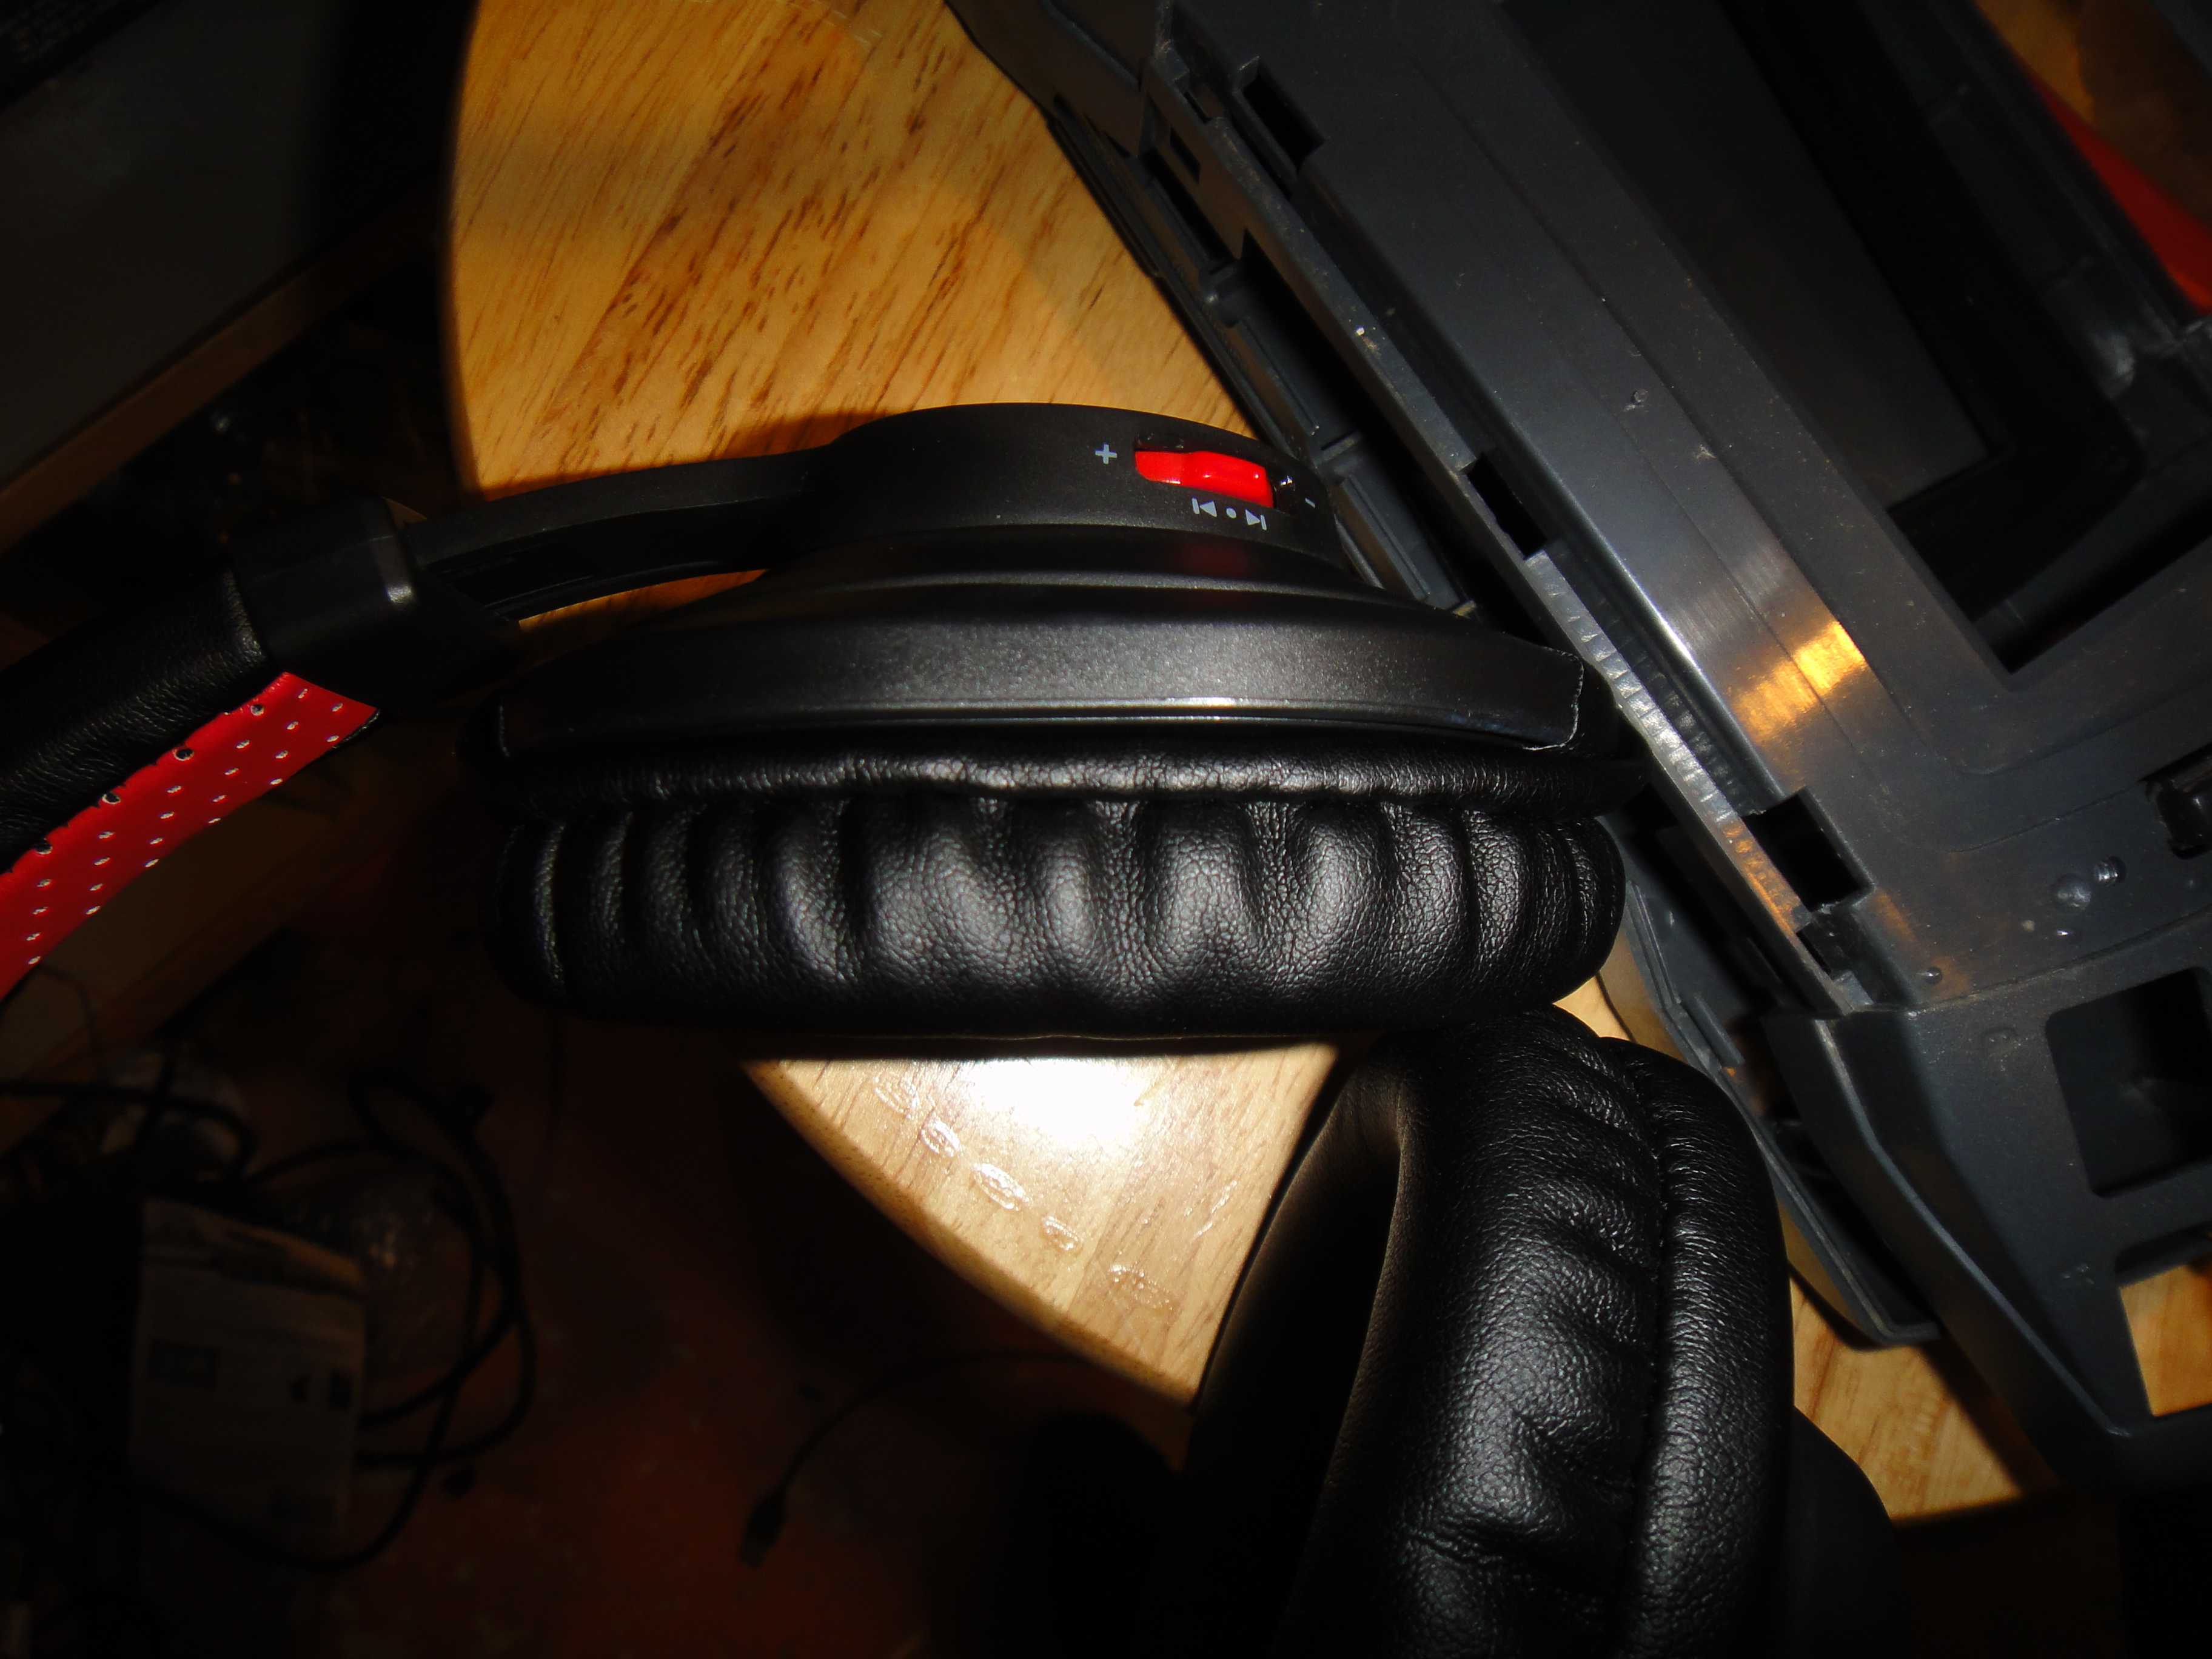
The first challenge was to open the headset. Easier said than done when there is absolutly no screws in sight. I messed around with them for about 15 minutes trying to find clamp but in the end, all you have to do it remove the cushions by lightly pulling on it. If the cushion seem not to come off easily or completly, you can try dislocking the outer plate hooks as they become visible while removing the cushion's fabric and it should make it easier after to remove the rest.
Once the cushion is removed, you'll finaly see the clip holding the case together. You can just unclip them while pulling a bit on the back until all four of them until the plastic rim get released.
You'll then see that the rest of the case is held at by the joint. You just need to pull on one site while applying pressure downward until the plastic cylender get off the joint. Be careful at this point not to apply too much strenght as you might end up breaking the part.
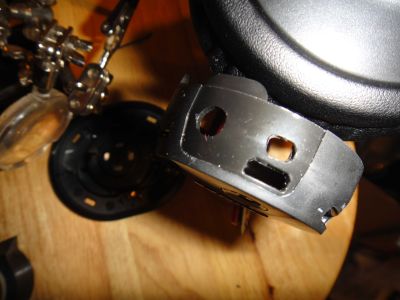
The circuit will now be exposed. Remove the two screws to free up the circuit board. Just be careful when pulling out the PCB as it will still be attached by wires to the the other head piece and also to the microphone.The ones going to the mic are really tiny and can break easily.
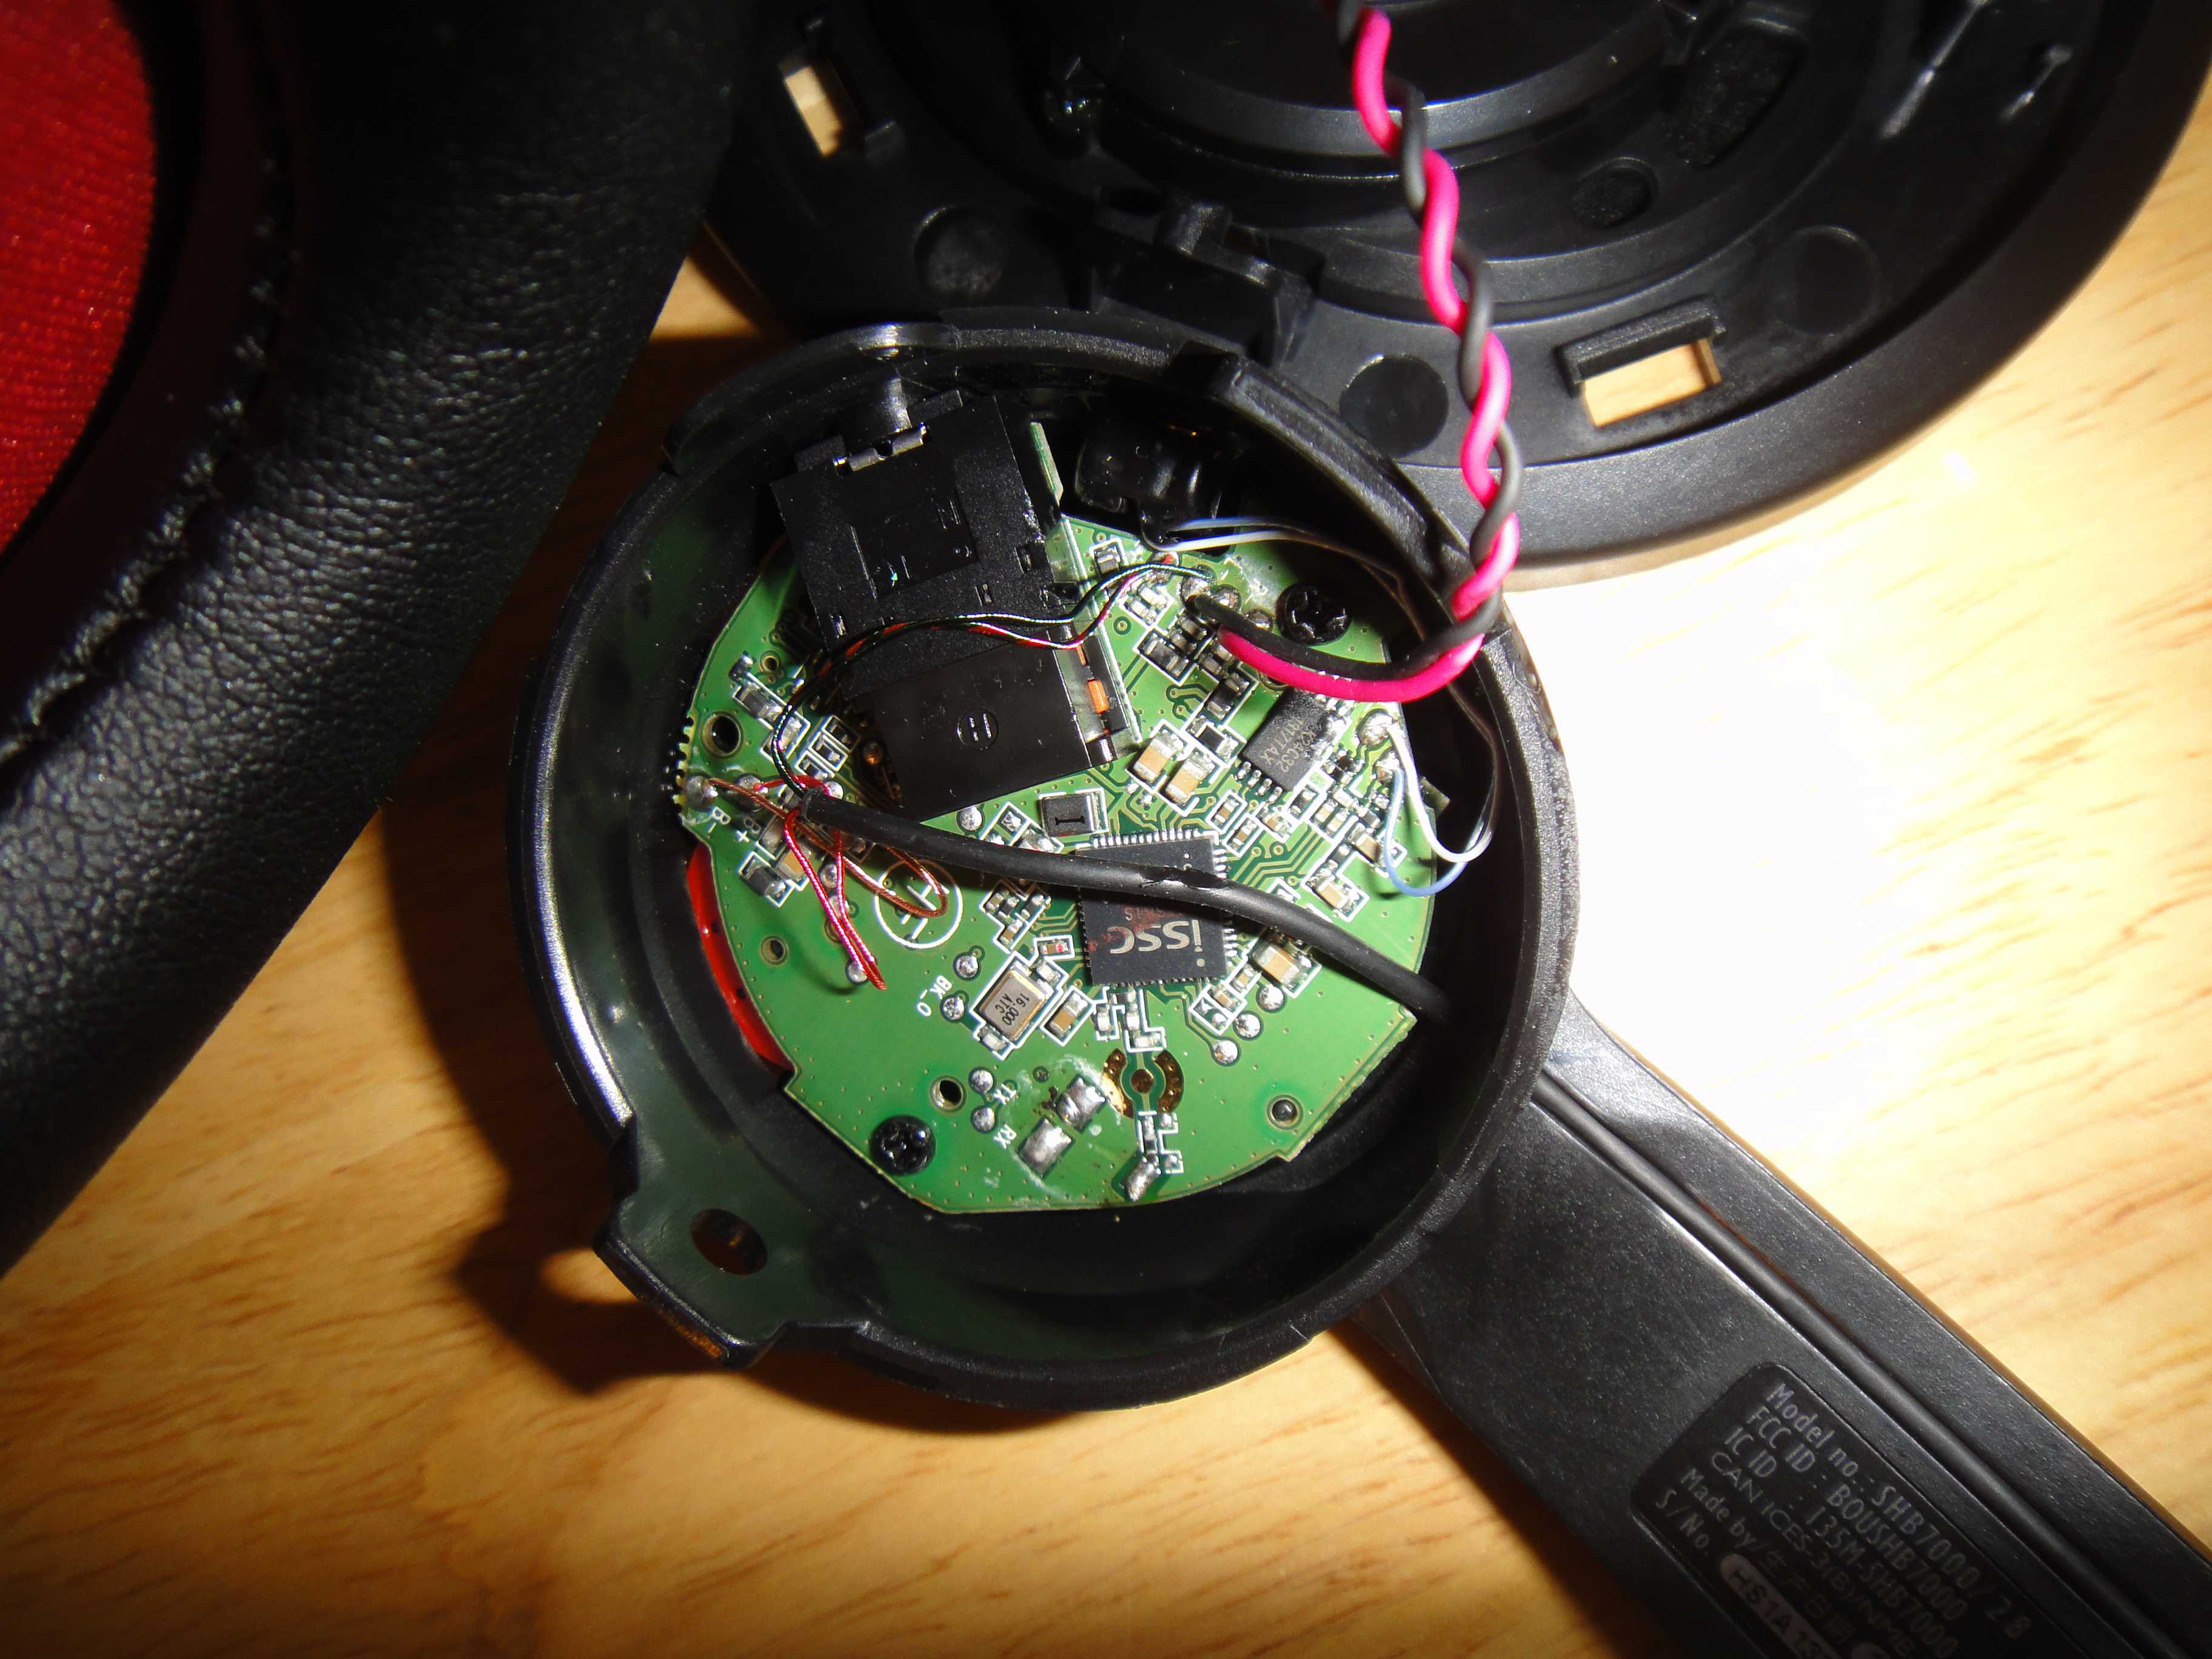
You can see the damage on the next picture. The pinkish part under the usb port is the backside of the traces that were ripped out.
This is obviously a problem as this will prevent re-soldering the plug back on the PCB. I was able to solder it again by re-routing some connections and creating more soldering surface on the ground plane around the connector to try and solidify the connector by making bigger solder joint at the ground connection. It seemed to work but the connector broke again when I pluged in the cable once re-assembled.
Now the issue with using a barrel type plug is that there is not a whole lot of space inside and it could be tricky to fix it unless you have one of those with a screw top. Of course I could have nought the perfect one online but I like to re-use old things I have laying around. I remembered that I had a broken bluetooth waterproof shower speaker (not as waterproof as it was supposed to) that was using a unnually small barrel plug. And I already had the proper usb cable that came with it so it was perfect.
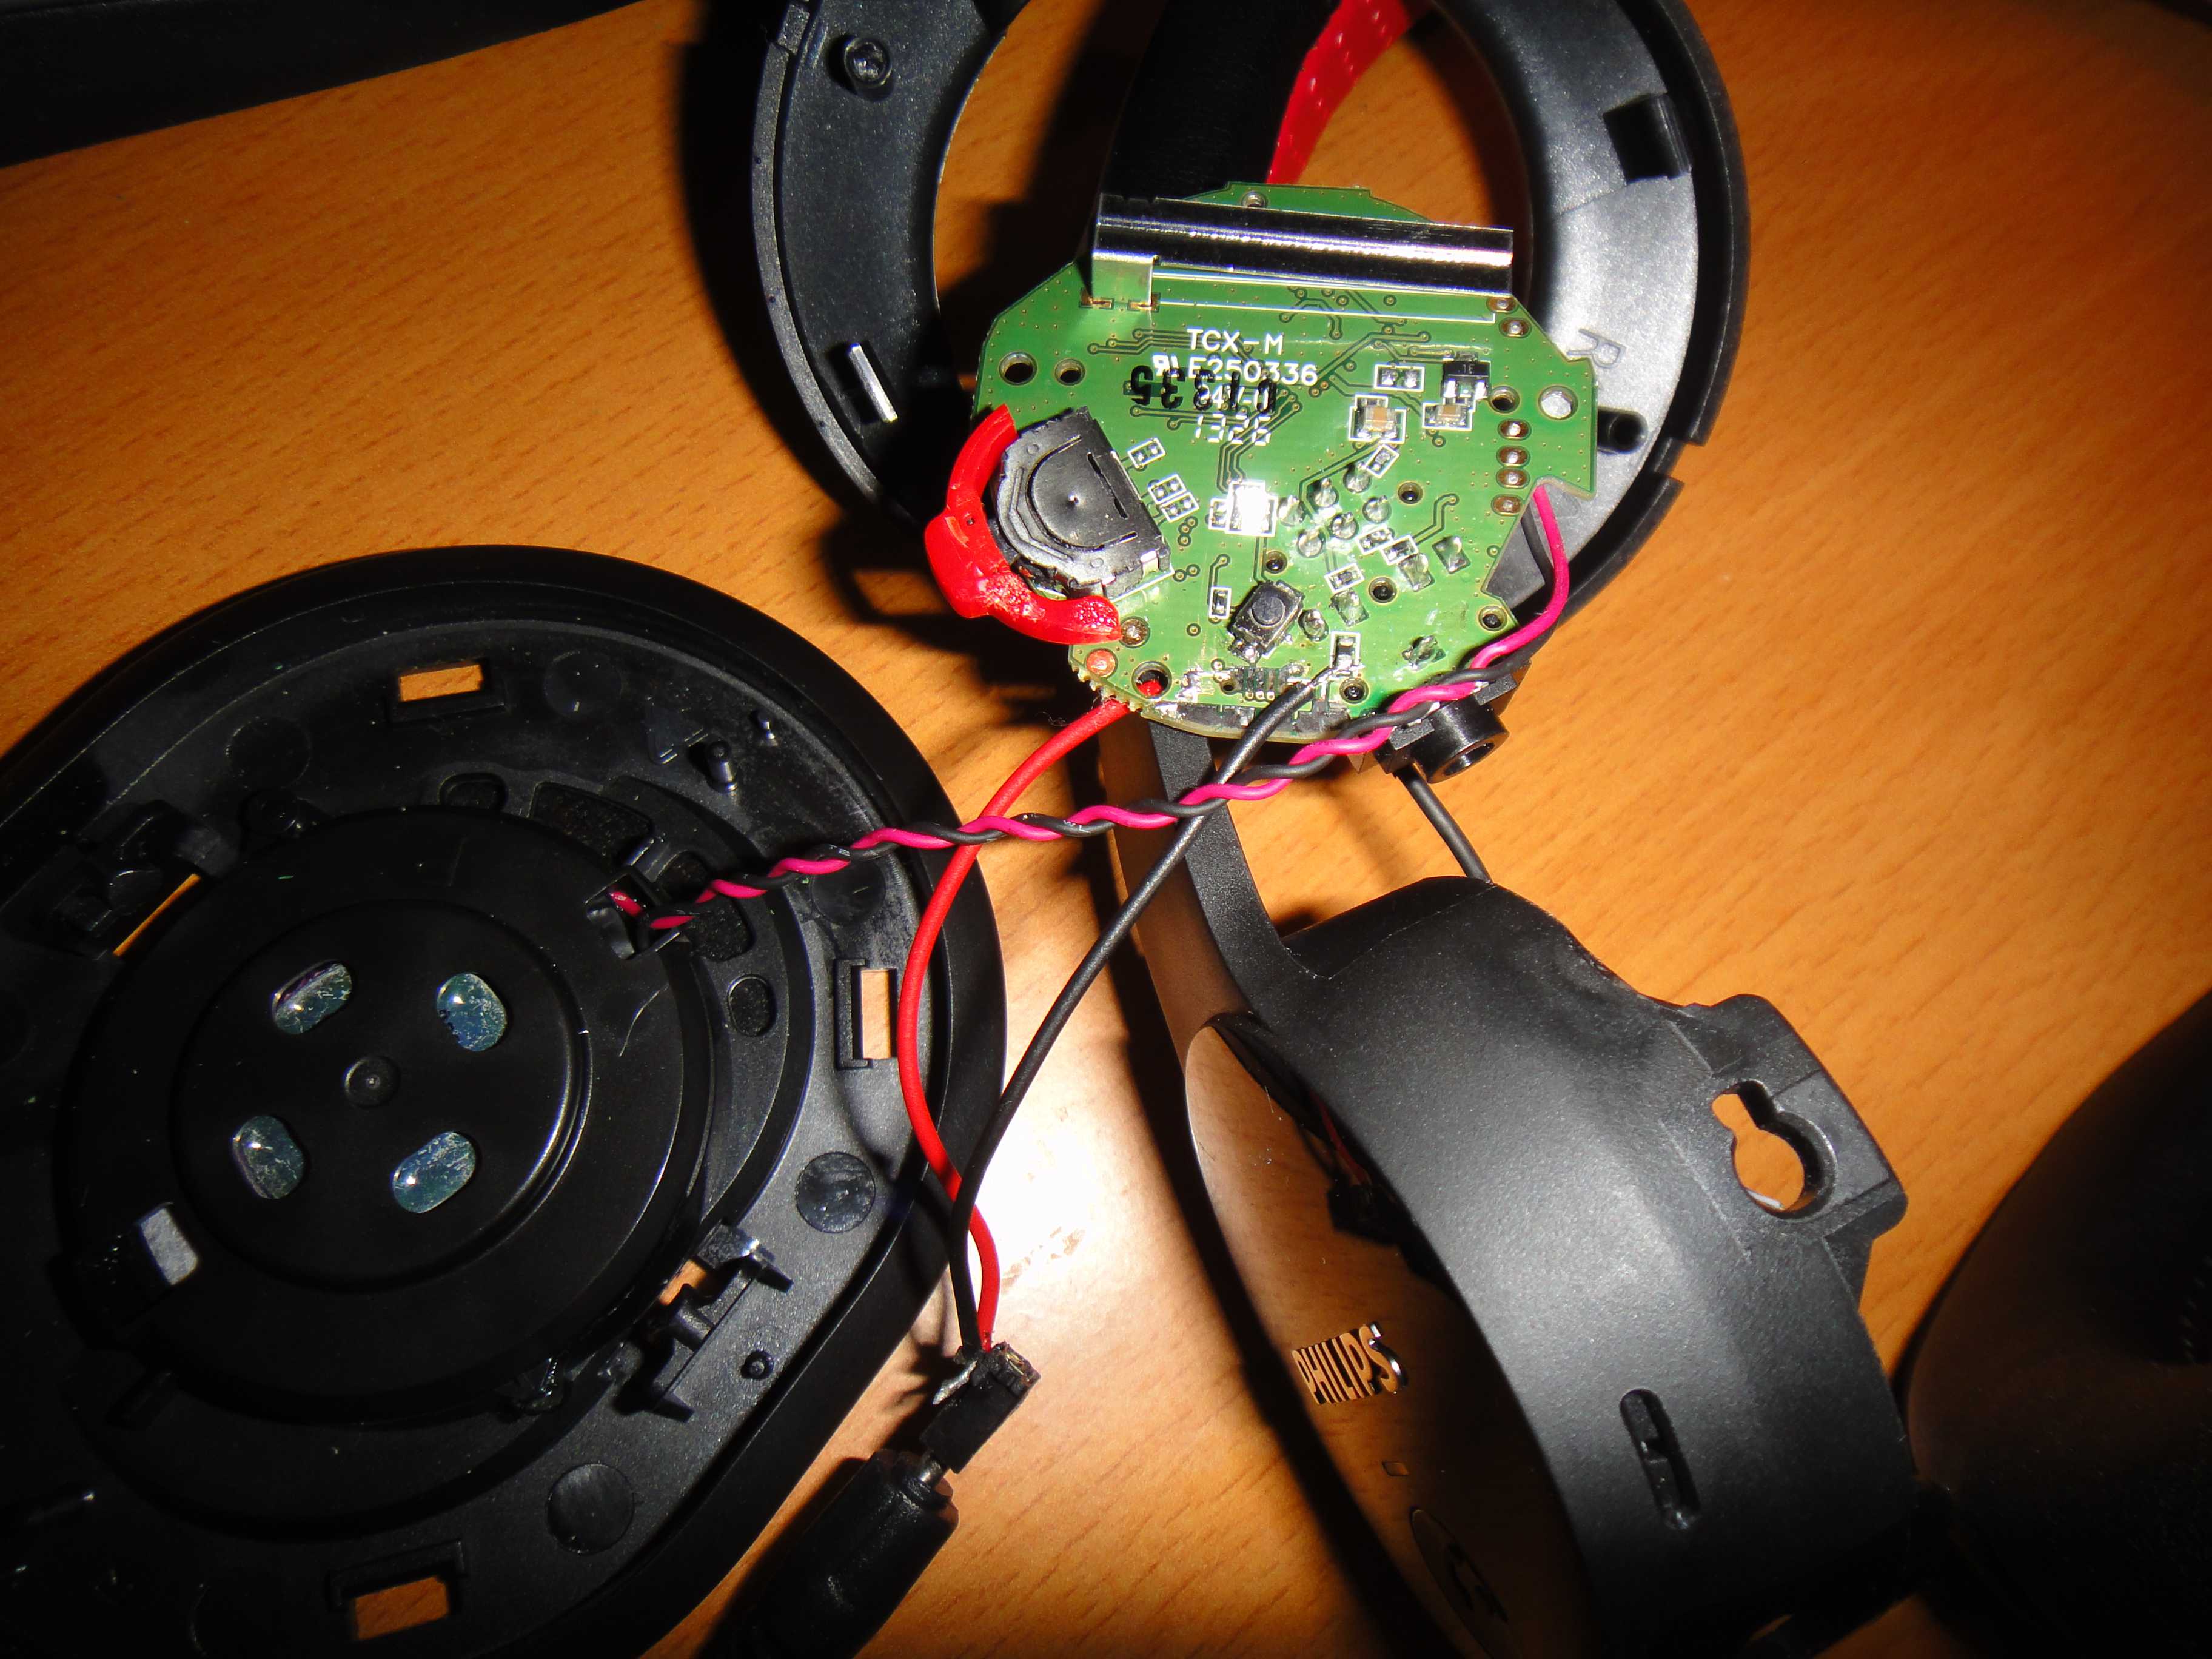
If you are unsure on how to connect the plug, here's a quick diagram showing how. If the trace were ripped off, just follow it to where it used to be connected and connect your wire there. The VCC line is connected to a small via and you could connect the wire to the other side of the circuit board if there is nothing left to solder to. Just check wit hthe continuity tester of your multimeter if you have one. You'll probably also need to modify a USB cable. You can take any USB cable laying around (old phone cable etc),cut it, strip the wire and connect the the Black and Red wire to your new DC barrel plug, one that fit with the connector you chose to use. No extra components are needed.
I did a quick test to make sure everything was working.
I drilled at hold just big enough for the plug to hold it place and then secured it with glue. I also took the opportunity to block the old USB port hole with the non-sticky side of a piece of electrical tape. I figured it would be better than a gaping hole on the side of the headphones. I chose to drill the hole near the headphone connector because installing it wouldn't really fit properly where the old USB used to be.
All that was left to do was re-assembly. Don't forget to put back the cushion before clipping it back together though. I did not realized when I closing it up and had to struggle to re-isnert the membrane of the cushion back into the grooves. Thanks to Damian and Manas Roy for pointing it out!
I was pretty happy with the final result (and so was my brother), other than the tiny un-even groove around the new plug (which I could fill later on with black epoxy or something similar), it almost look like it came that way. Plus, the location of the new plug is perfect because it get completly hidden when the cushion is set to the regular position and only get exposed when you rotate the ear piece to the maxium allowed position. I would still be careful when plugging the cable to charge as I couldn't put as much glue as I would have wanted but it seem pretty solid as it is and I doubt it will give in anytime soon.Twitter
(function(d, s, id) {
var js, fjs = d.getElementsByTagName(s)[0];
if (d.getElementById(id)) {return;}
js = d.createElement(s); js.id = id;
js.src = "//connect.facebook.net/en_GB/all.js#xfbml=1";
fjs.parentNode.insertBefore(js, fjs);
}(document, 'script', 'facebook-jssdk'));{lang: 'en-GB'}
My brother recently purchased a pair of new Phillips SHB7000 wireless headset online. About 5 minutes after openning the box, he dropped it from a negligeable height (about 2 feet)while it was charging. It broke before it could even use it. The micro-usb B charging port solder joint gave in and the plug got pushed inside the headset. Now, I am not sure why company still insist on using micro-usb B as charging port on everything because those things always break. It is a very fragile port because of the very small surface available for the solder. The sellers had gladly agreed to exchange them even after we told him it was basicly broke by our own accident but the price shipping them back would have made it more of a loss than anything so he came to me to check if I could do anything. After figuring out how to open the damn thing (no screws or instructions online on dissabling it), I found out exactly what I was expecting. The trace got torn off the PCB. While I was still able to resolder it back into places, it broke again right after I was done re-assembling the headset. I decided that the best course of action was to do what the Phillips engineer shoudl have done in the beginning and replace the flimsy micro-usb port with a barrel type DC connector. This way, we would kill two birds with one stone, repair the broken headset and fix the original design flaw. Now this is obviously a very straightforward repair, one that doesn't really require a tutorial but I figured it might help someone facing the same issue.
The first challenge was to open the headset. Easier said than done when there is absolutly no screws in sight. I messed around with them for about 15 minutes trying to find clamp but in the end, all you have to do it remove the cushions by lightly pulling on it. If the cushion seem not to come off easily or completly, you can try dislocking the outer plate hooks as they become visible while removing the cushion's fabric and it should make it easier after to remove the rest.
Once the cushion is removed, you'll finaly see the clip holding the case together. You can just unclip them while pulling a bit on the back until all four of them until the plastic rim get released.
You'll then see that the rest of the case is held at by the joint. You just need to pull on one site while applying pressure downward until the plastic cylender get off the joint. Be careful at this point not to apply too much strenght as you might end up breaking the part.
The circuit will now be exposed. Remove the two screws to free up the circuit board. Just be careful when pulling out the PCB as it will still be attached by wires to the the other head piece and also to the microphone.The ones going to the mic are really tiny and can break easily.
You can see the damage on the next picture. The pinkish part under the usb port is the backside of the traces that were ripped out.
This is obviously a problem as this will prevent re-soldering the plug back on the PCB. I was able to solder it again by re-routing some connections and creating more soldering surface on the ground plane around the connector to try and solidify the connector by making bigger solder joint at the ground connection. It seemed to work but the connector broke again when I pluged in the cable once re-assembled.
Now the issue with using a barrel type plug is that there is not a whole lot of space inside and it could be tricky to fix it unless you have one of those with a screw top. Of course I could have nought the perfect one online but I like to re-use old things I have laying around. I remembered that I had a broken bluetooth waterproof shower speaker (not as waterproof as it was supposed to) that was using a unnually small barrel plug. And I already had the proper usb cable that came with it so it was perfect.
If you are unsure on how to connect the plug, here's a quick diagram showing how. If the trace were ripped off, just follow it to where it used to be connected and connect your wire there. The VCC line is connected to a small via and you could connect the wire to the other side of the circuit board if there is nothing left to solder to. Just check wit hthe continuity tester of your multimeter if you have one. You'll probably also need to modify a USB cable. You can take any USB cable laying around (old phone cable etc),cut it, strip the wire and connect the the Black and Red wire to your new DC barrel plug, one that fit with the connector you chose to use. No extra components are needed.
I did a quick test to make sure everything was working.
I drilled at hold just big enough for the plug to hold it place and then secured it with glue. I also took the opportunity to block the old USB port hole with the non-sticky side of a piece of electrical tape. I figured it would be better than a gaping hole on the side of the headphones. I chose to drill the hole near the headphone connector because installing it wouldn't really fit properly where the old USB used to be.
All that was left to do was re-assembly. Don't forget to put back the cushion before clipping it back together though. I did not realized when I closing it up and had to struggle to re-isnert the membrane of the cushion back into the grooves. Thanks to Damian and Manas Roy for pointing it out!
I was pretty happy with the final result (and so was my brother), other than the tiny un-even groove around the new plug (which I could fill later on with black epoxy or something similar), it almost look like it came that way. Plus, the location of the new plug is perfect because it get completly hidden when the cushion is set to the regular position and only get exposed when you rotate the ear piece to the maxium allowed position. I would still be careful when plugging the cable to charge as I couldn't put as much glue as I would have wanted but it seem pretty solid as it is and I doubt it will give in anytime soon.Twitter
(function(d, s, id) {
var js, fjs = d.getElementsByTagName(s)[0];
if (d.getElementById(id)) {return;}
js = d.createElement(s); js.id = id;
js.src = "//connect.facebook.net/en_GB/all.js#xfbml=1";
fjs.parentNode.insertBefore(js, fjs);
}(document, 'script', 'facebook-jssdk'));{lang: 'en-GB'}
60 out of
100 with
1 ratings
My brother recently purchased a pair of new Phillips SHB7000 wireless headset online. About 5 minutes after openning the box, he dropped it from a negligeable height (about 2 feet)while it was charging. It broke before it could even use it. The micro-usb B charging port solder joint gave in and the plug got pushed inside the headset. Now, I am not sure why company still insist on using micro-usb B as charging port on everything because those things always break. It is a very fragile port because of the very small surface available for the solder. The sellers had gladly agreed to exchange them even after we told him it was basicly broke by our own accident but the price shipping them back would have made it more of a loss than anything so he came to me to check if I could do anything. After figuring out how to open the damn thing (no screws or instructions online on dissabling it), I found out exactly what I was expecting. The trace got torn off the PCB. While I was still able to resolder it back into places, it broke again right after I was done re-assembling the headset. I decided that the best course of action was to do what the Phillips engineer shoudl have done in the beginning and replace the flimsy micro-usb port with a barrel type DC connector. This way, we would kill two birds with one stone, repair the broken headset and fix the original design flaw. Now this is obviously a very straightforward repair, one that doesn't really require a tutorial but I figured it might help someone facing the same issue.
The first challenge was to open the headset. Easier said than done when there is absolutly no screws in sight. I messed around with them for about 15 minutes trying to find clamp but in the end, all you have to do it remove the cushions by lightly pulling on it. If the cushion seem not to come off easily or completly, you can try dislocking the outer plate hooks as they become visible while removing the cushion's fabric and it should make it easier after to remove the rest.

Once the cushion is removed, you'll finaly see the clip holding the case together. You can just unclip them while pulling a bit on the back until all four of them until the plastic rim get released.

You'll then see that the rest of the case is held at by the joint. You just need to pull on one site while applying pressure downward until the plastic cylender get off the joint. Be careful at this point not to apply too much strenght as you might end up breaking the part.

The circuit will now be exposed. Remove the two screws to free up the circuit board. Just be careful when pulling out the PCB as it will still be attached by wires to the the other head piece and also to the microphone.The ones going to the mic are really tiny and can break easily.

You can see the damage on the next picture. The pinkish part under the usb port is the backside of the traces that were ripped out.

This is obviously a problem as this will prevent re-soldering the plug back on the PCB. I was able to solder it again by re-routing some connections and creating more soldering surface on the ground plane around the connector to try and solidify the connector by making bigger solder joint at the ground connection. It seemed to work but the connector broke again when I pluged in the cable once re-assembled.
Now the issue with using a barrel type plug is that there is not a whole lot of space inside and it could be tricky to fix it unless you have one of those with a screw top. Of course I could have nought the perfect one online but I like to re-use old things I have laying around. I remembered that I had a broken bluetooth waterproof shower speaker (not as waterproof as it was supposed to) that was using a unnually small barrel plug. And I already had the proper usb cable that came with it so it was perfect.
If you are unsure on how to connect the plug, here's a quick diagram showing how. If the trace were ripped off, just follow it to where it used to be connected and connect your wire there. The VCC line is connected to a small via and you could connect the wire to the other side of the circuit board if there is nothing left to solder to. Just check wit hthe continuity tester of your multimeter if you have one. You'll probably also need to modify a USB cable. You can take any USB cable laying around (old phone cable etc),cut it, strip the wire and connect the the Black and Red wire to your new DC barrel plug, one that fit with the connector you chose to use. No extra components are needed.

I did a quick test to make sure everything was working.

I drilled at hold just big enough for the plug to hold it place and then secured it with glue. I also took the opportunity to block the old USB port hole with the non-sticky side of a piece of electrical tape. I figured it would be better than a gaping hole on the side of the headphones. I chose to drill the hole near the headphone connector because installing it wouldn't really fit properly where the old USB used to be.
All that was left to do was re-assembly. Don't forget to put back the cushion before clipping it back together though. I did not realized when I closing it up and had to struggle to re-isnert the membrane of the cushion back into the grooves. Thanks to Damian and Manas Roy for pointing it out!

I was pretty happy with the final result (and so was my brother), other than the tiny un-even groove around the new plug (which I could fill later on with black epoxy or something similar), it almost look like it came that way. Plus, the location of the new plug is perfect because it get completly hidden when the cushion is set to the regular position and only get exposed when you rotate the ear piece to the maxium allowed position. I would still be careful when plugging the cable to charge as I couldn't put as much glue as I would have wanted but it seem pretty solid as it is and I doubt it will give in anytime soon.


Yes, it is possible to replace the battery by removing left cushion.
It is a 200mA 3.7 volts.
I never had a problem with this headset, not very expensive and suitable for my (big) ears. Of course, it is not worth a headphone two or three times more expensive ...
And the battery is still alive as the beginning!!
Thanks again,
Philippe, from France
I have a problem when I charge my headphone the Bluetooth audio didn't work after a moment. I need help.
Surprisingly when it comes to contact with charger, work S properly, but once the charger is disconnected, it stops.
I think it would be the problem of rechargeable battery.
I opened it follows your instructions, but couldn't find anything like rechargeable battery.
Pls. help for finding it.
My right audio stopped this morning, and within 10min, using your instructions I had found the issue.
One of the speaker cables had come loose - now to find someone to solder it back.
Many Thanks,
Pete
Quoting Giovanni:
I doubt servicing the inside of the audio connector will be a possibility. Even if you manage to open it, it will probably not re-assemble after . It would probably be more realistic to try and find a replacement connector that has the same footprint or use the plug fro man extension, solder a wire to it and have it dangle a bit outside of the casing.
Thanks