DIY 10x10 WS2812 RGB LED Matrix
DIY 10x10 WS2812 RGB LED Matrix
This is not really a tutorial article as it is very simple, it is more an idea I wanted to share. I recently started playing with WS2812 addressable RGB LEDs and was blown away by how easy they are to control and by how little they cost. I looked into buying a matrix to try out different animation pattern and for potential future project but was turned off by the prices. While I could easily get 100 WS2812 LEDs for little more than 10$ USD, LEDs matrix bigger than 8x8, on the other hand, would sell for 30$ and up. I felt that it was too much just to mess around with and thought 8x8 matrix were a bit too small to do anything really interesting. I also happened to already have a panel of 100 LEDs on hand and did not feel like waiting a month to order any of the decently priced matrix from China. Seeing how the single LEDs would be shipped to me in 10x10 panels, I figured it could easily be turned into a matrix with little modification and a little elbow grease!
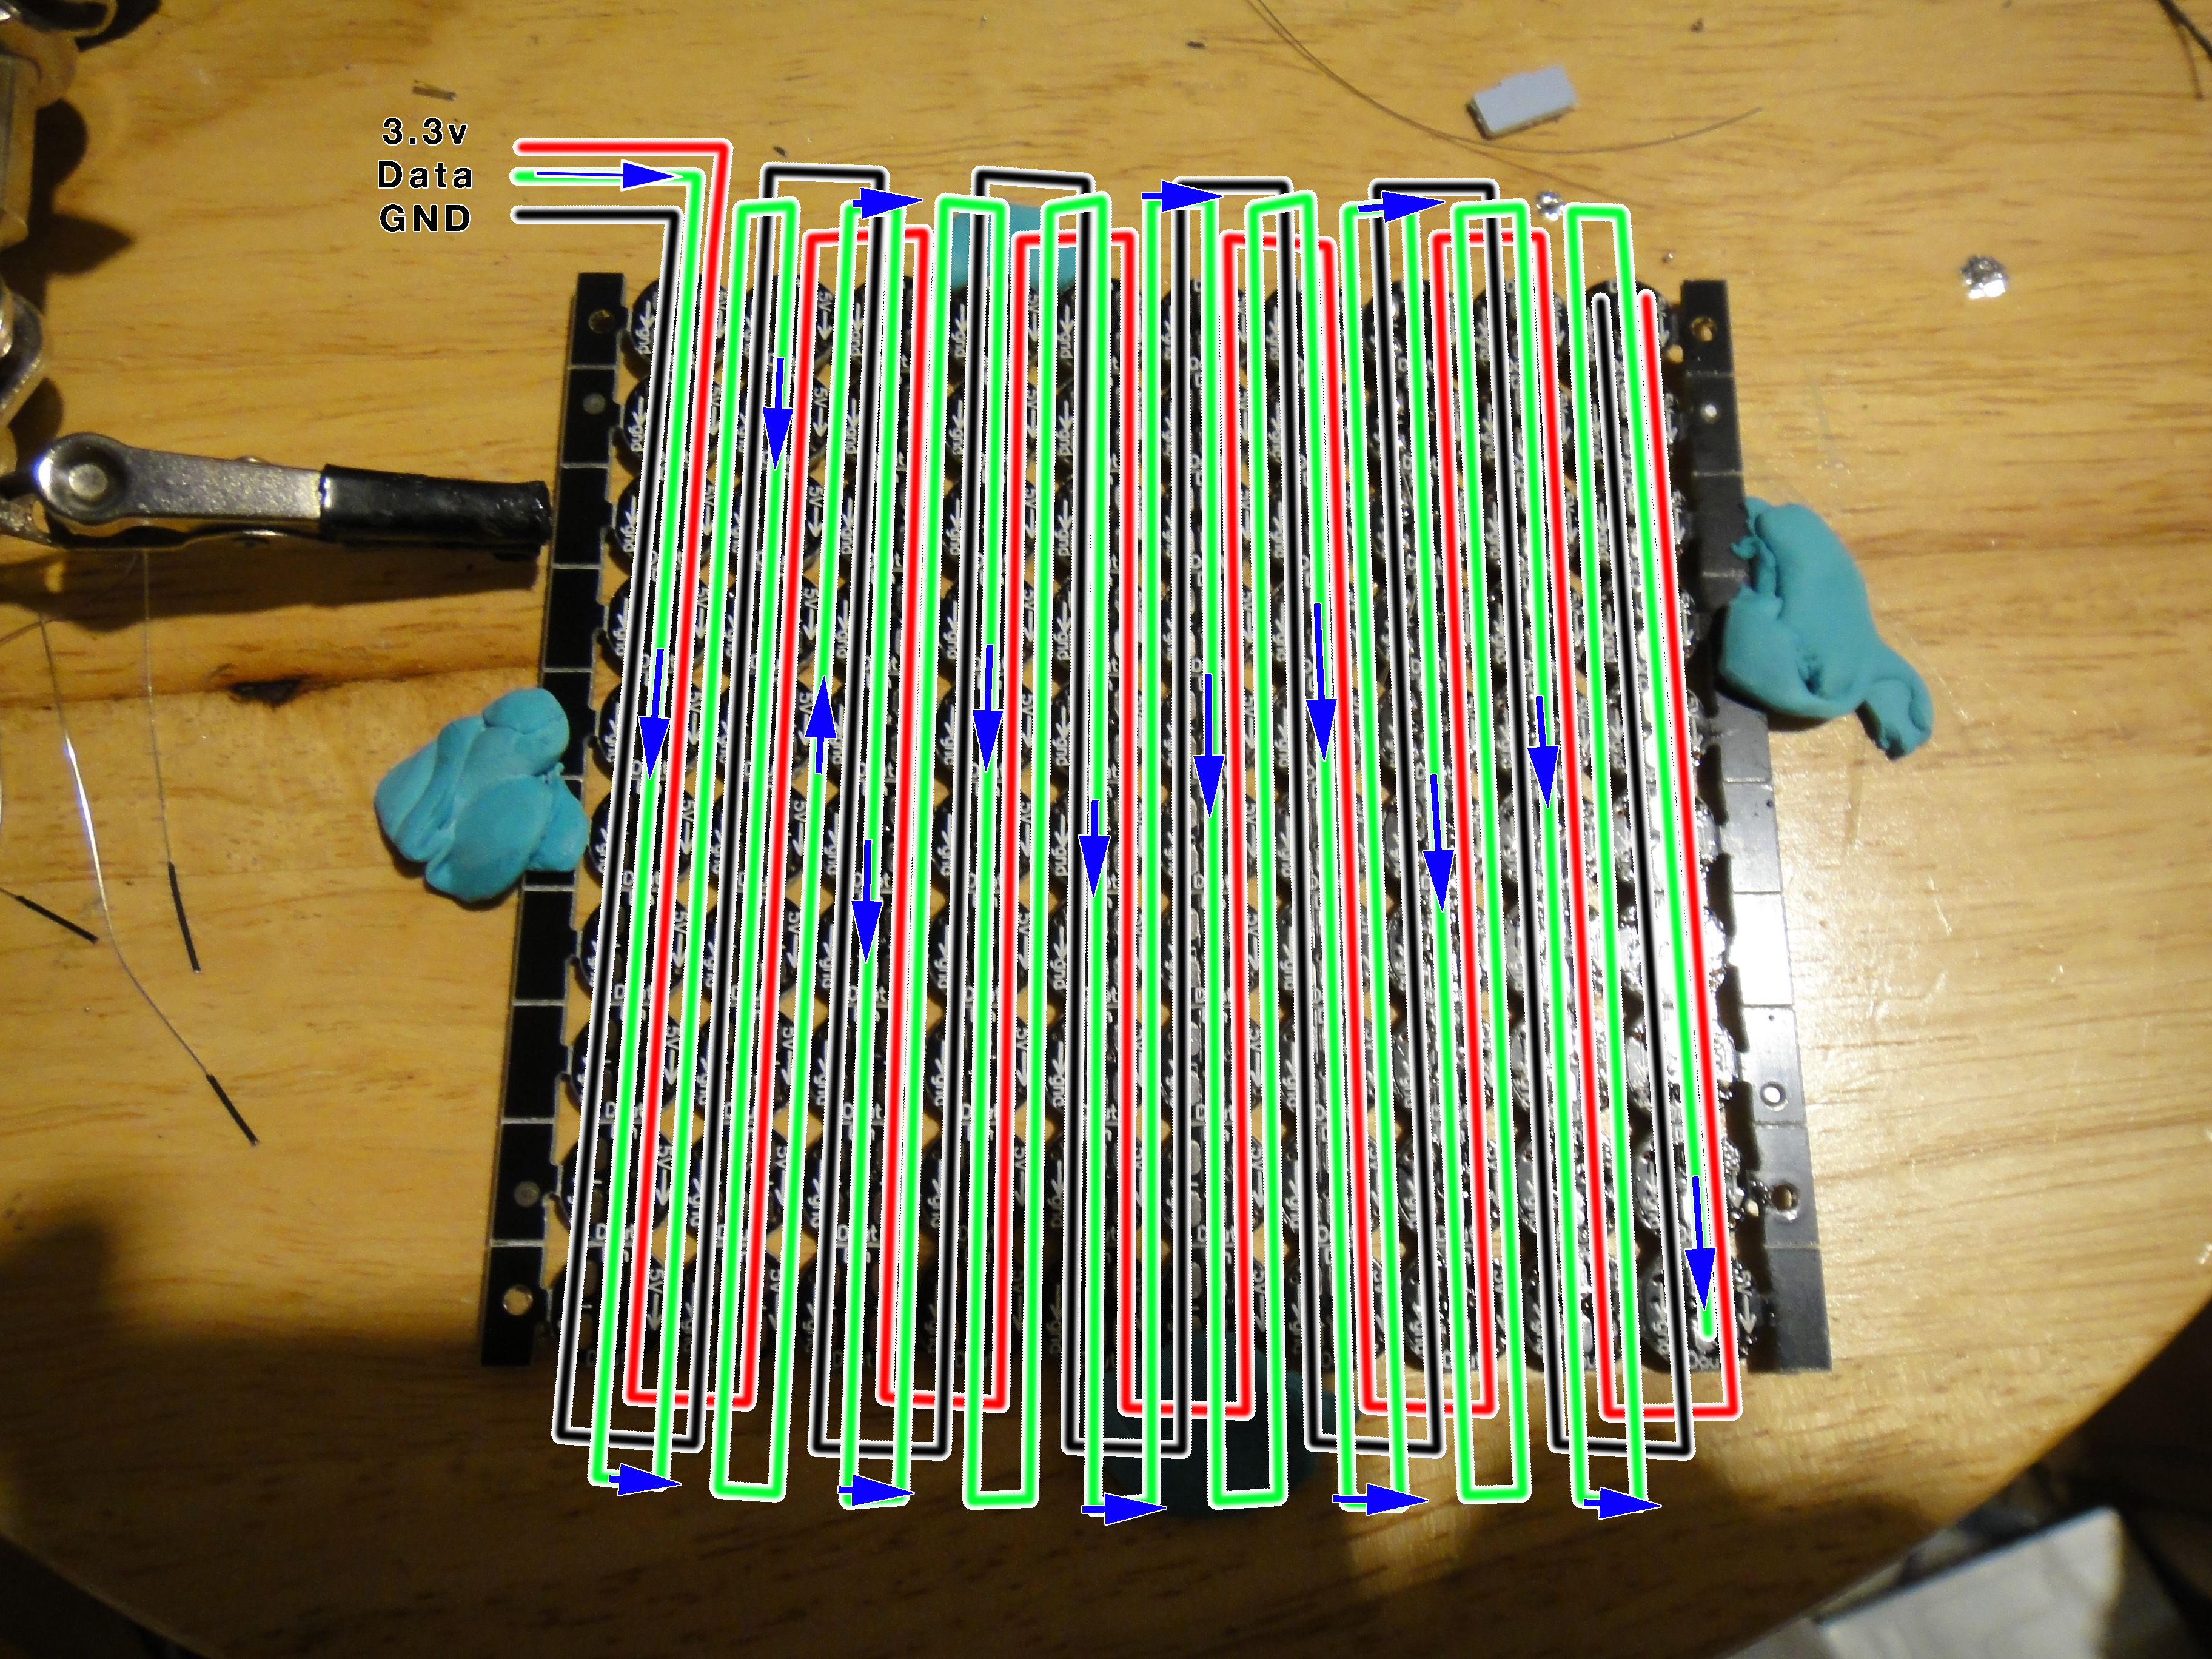
Thoses panels are made to be broken apart so they are not the most sturdy PCB to work on but you can help solidify the frame by linking the VCC and GND connection with thicker wire. I started wiring them with higher gauge wires but quickly switched to thin Kynar wire since it was so much faster to solder everything without the added heat dissipation problem of using thicker wire. I figured that I could always solidify the frame later if it felt too weak to hold together. I had the panel held in place by using blue tack gum (used to hold posters and such).
The wiring is very simple, connect all the GND together and the 5v together. You can just solder one big strip without breaking the wire between in and out for those but the data line needs to be split. Be sure to be careful to solder the data line properly from out to in otherwise some of your LED won't be working or your animation will be messed up.
Here you go, a nice 10x10 WS2812 LEDs matrix for about 10$. I'll let you be the judge of whether saving about 20$ is worth manually soldering hundreds of wire bits X) You could also start with a 10x10 and gradually add extra panel to it to make a bigger array as you get more experienced playing with the WS2812b LED!
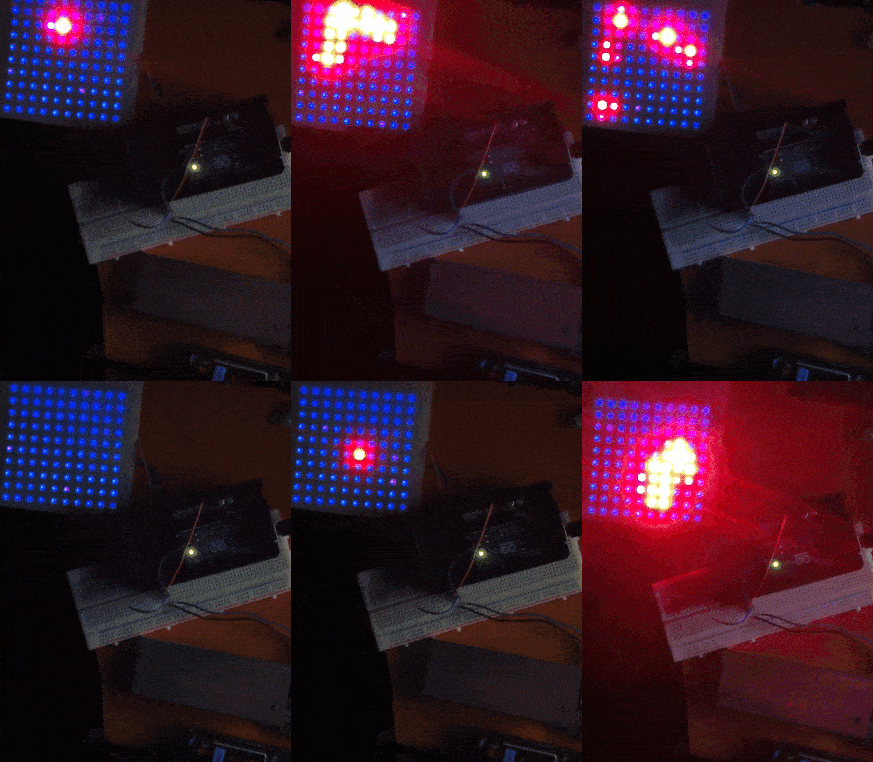
Here is the matrix in all its glory running the great firework LED simulation from the FastLED arduino library. The paper over the matrix is a craft paper I put to help diffuse a bit the LED light a bit and give a better visual effect. Wax paper could also be used for this purpose.
Twitter
(function(d, s, id) {
var js, fjs = d.getElementsByTagName(s)[0];
if (d.getElementById(id)) {return;}
js = d.createElement(s); js.id = id;
js.src = "//connect.facebook.net/en_GB/all.js#xfbml=1";
fjs.parentNode.insertBefore(js, fjs);
}(document, 'script', 'facebook-jssdk'));{lang: 'en-GB'}
40 out of
100 with
1 ratings
This is not really a tutorial article as it is very simple, it is more an idea I wanted to share. I recently started playing with WS2812 addressable RGB LEDs and was blown away by how easy they are to control and by how little they cost. I looked into buying a matrix to try out different animation pattern and for potential future project but was turned off by the prices. While I could easily get 100 WS2812 LEDs for little more than 10$ USD, LEDs matrix bigger than 8x8, on the other hand, would sell for 30$ and up. I felt that it was too much just to mess around with and thought 8x8 matrix were a bit too small to do anything really interesting. I also happened to already have a panel of 100 LEDs on hand and did not feel like waiting a month to order any of the decently priced matrix from China. Seeing how the single LEDs would be shipped to me in 10x10 panels, I figured it could easily be turned into a matrix with little modification and a little elbow grease!
Thoses panels are made to be broken apart so they are not the most sturdy PCB to work on but you can help solidify the frame by linking the VCC and GND connection with thicker wire. I started wiring them with higher gauge wires but quickly switched to thin Kynar wire since it was so much faster to solder everything without the added heat dissipation problem of using thicker wire. I figured that I could always solidify the frame later if it felt too weak to hold together. I had the panel held in place by using blue tack gum (used to hold posters and such).

The wiring is very simple, connect all the GND together and the 5v together. You can just solder one big strip without breaking the wire between in and out for those but the data line needs to be split. Be sure to be careful to solder the data line properly from out to in otherwise some of your LED won't be working or your animation will be messed up.

Here you go, a nice 10x10 WS2812 LEDs matrix for about 10$. I'll let you be the judge of whether saving about 20$ is worth manually soldering hundreds of wire bits X) You could also start with a 10x10 and gradually add extra panel to it to make a bigger array as you get more experienced playing with the WS2812b LED!
Here is the matrix in all its glory running the great firework LED simulation from the FastLED arduino library. The paper over the matrix is a craft paper I put to help diffuse a bit the LED light a bit and give a better visual effect. Wax paper could also be used for this purpose.


