
I noticed that firmware dump for vintage synth can be incredibly hard to come by unless you know exactly where to look. Most of the time, if you are looking to upgrade or repair your favourite synth, you might find some firmware buried deep in synth forum's while some other seems to only be available by buying very overpriced preprogramed EPROM chip from sellers on eBay. This is my attempt at resolving the situation and making as many firmware dumps as possible freely available for everyone. This page became much more popular than I originally anticipated and seem to have quickly become the biggest vintage synthesizer firmware collection freely available online. Now I understand that this page is pretty simple and lacks several things that would make it more professional and useful. Things like standardization of the filenames, proper credit, better classification, proper database and more information about the chips used is currently lacking but I am planning to fix this in the future. I just haven't managed to find the time yet to do all this so bear with me as I figured that sharing the data was the main purpose of the page and that I better share what I have like this compared to wait to do it more properly and not share anything until.
If you have access to any other chip dump, contact me! Also, if you have a synth with a firmware or sample chip you would like to have dumped and preserved, contact me and I will be happy to help out reading the chip content for you and share it on the page.
*Keep in mind that I do not own any of those Synth and can't test the data myself nor can I answer specific questions about them. I am only sharing the dumps hoping that they will be useful to peoples.
Huge thanks to Rasputin from VintageSynth forum for his help kickstarting this archive, Andreas Markusen along with Claudio ''SerialSinger'' Falcone for not only providing many synth dumps but also for his invaluable help finding out the numerous duplicate dumps that were cluttering the page!
*Please, do not comment or e-mail asking for specific firmware. If I had it, it would be here. If somebody wanted to share it, it would get added. Request comments won't be published in an effort not to have a wall of peoples asking for random firmwares.*
Last update: 04/15/2025
Special Thanks to Vadim, who paid good money so he could share the Akai MPC60 v2.14 firmware with everyone!
| Akai AX73 VX90 v1.4a EPROM Firmware.zip | Vadim Yastrebov! |
| Virus_TI2_FW.zip | Brazorf |
| SCI Prophet T-8 diagnostic ROM.zip | José Ángel Morente |
| Kurzweil ExpressionMate (V1.1).zip | Jake Jacoby |
| Kawai Q-80EXE (KP058G).zip | Jake Jacoby |
| Yamaha QY300.zip | Jake Jacoby |
| Roland JX-8P v3.1.rar | Ron |
| Akai MPC60 EPROM Firmware (v2.14)(1).zip | Vadim |
| roland_SCC-1A(mcu).rar | Karmeck |
| roland_scc-1a Rxxx.rar | Karmeck |
| roland_scc-1a.zip | Karmeck |
02/17/2025
| Roland D-50 V2.22.rar | VST Sample |
02/07/2025
| Yamaha Rex50 V1.2.zip | Ludus |
| H3000 3500 upgrade.rar | Al Spitzley |
| Linn 9000 5.17 OS.zip | Al Spitzley |
| Roland cr-78 cpu mask rom.zip | Rob Willis |
| Gallien_Krueger_Guitar_Pre-Amp_100MPL.zip | Ron |
| ESQ1_OS_ver2.00.zip | Evgeniy |
| Viscount_RD-70_v1.2.zip | Kádár István |
| MPC60 Vimana 3.15.zip | Kris O'Sullivan |
| Korg_Triton_EXB_PCM01.zip | Allan Begolo-Wyatt |
| Yamaha EX5-EX5R_ROM_FILES_v1.11_1.14.7z | Daniel Lehtihet |
| Sony HR-MP5 1.10E and 1.11J ROMs.zip | Tim Hill |
| Akai_CD3000i_V1.60.7z | Jack Blake |
| Akai_S700_2.1.BIN_.zip | Jack Blake |
| Akai AX73 VX90 v1.2a EPROM Firmware.zip | Vadim Yastrebov |
| Akai XR10 v1.1 EPROM Firmware.zip | Vadim Yastrebov |
| Akai XR10 v2.2 EPROM Firmware.zip | Vadim Yastrebov |
| Akai AX73 VX90 v1.2 EPROM Firmware.zip | Vadim Yastrebov |
| Akai XR10 v2.1 EPROM Firmware.zip | Vadim Yastrebov |
| Akai AX73 VX90 v1.1 EPROM Firmware.zip | Vadim Yastrebov |
| Roland A880 v1.03.zip | Richard Birch |
| KORG 05RW 1993.09.07 Ver.11.zip | Richard Birch |
| AAC_Tiracon_6V_1990_SER1266.zip | Maik Schlösser |
10/04/2024
| RSF_SD140_34.zip | Patrick Tuchais |
| Microwave_XT.zip | Anteelope |
| Alesis Wedge (W1 v1.02 2-31-0077 06-30-97) [TMS27C512].zip | Retrojunk |
| Boss RRV-10 (1.0.1) [MSM27C128K].zip | Retrojunk |
| Digitech Studio S100 (72-3068-01 V1.20) [W27C512].zip | Retrojunk |
| Korg 05RW (930207) [NEC-D27C2001].zip | Retrojunk |
| Yamaha MU50 (1.06) [27C4096].zip | Retrojunk |
| Zoom 9050 (Fri Jun 11 20-13-52 1993 0001 9050 BASE LINE Prog Ver 026) [TMS27C020].zip | Retrojunk |
| Casio_CZ-1_Firmware.zip | José Ángel Morente |
| Studiologic_2001_version_2.1.zip | Ron |
| roland_jv1080.zip | Giulio |
| rhodes_mk80_cpub.zip | Giulio |
| Tascam_AQ-65 EPROM DATA_marked 8401_M5L2764_DIP28.zip | Luke @ Lofi Music |
| EPROM KAWAI 80 AND ROLAND MC500MKII.zip | Riva Lima |
06/26/2024
Another long overdue update, with several rare and hard to find firmware! Thanks again to everyone's helping and to the queen of Synthetizer, Alison Cassidy, who seem to be working extra these days to provide us with very hard to find stuff.
| Vermona_DRM_V10.zip | Ohm.studio |
| Access Virus TI.zip | RoboKun |
| Prophet_P2000_V3.0.zip | Alison Cassidy |
| Kawai K5 (1.0).zip | Alison Cassidy |
| EDP Spider.zip | Alison Cassidy |
| Mulogix Slave32 v3.3 0xA3EB.zip | Alison Cassidy |
| Yamaha DX7 Grey Matter E! V2.02.zip | Alison Cassidy |
| Akai S950 1.2a.zip | Vadim |
| Akai S950 1.2b.zip | Vadim |
| Roland JV880.zip | Giulio |
| Roland RD500 v1.00.zip | Giulio |
| Roland S-760 s760 v1.0.1.zip | Giulio |
| SQR 32 Plus v2.03.zip | Tony Blake |
| Bel_Digital_Delay_BDE-3200.1_FW_NEC_D2764D.zip | Satchy |
| Roland SC-55 mkII.zip | Karmeck |
| Roland SC-55 v1.21.rar | Karmeck |
| Roland SC-155_rev1.rar | Karmeck |
| Roland G800 rev 1.06.zip | nikifena |
03/29/2024
| Dynacord_boomer_rom_v1_0.zip | Ewan Colsell |
| Doepfer_ms404_v1_04.zip | Ewan Colsell |
| DOEPFER-MS404_105.zip | Ewan Colsell |
03/11/2024
| Marion Systems MSR-2 Firmware.zip | Alison Cassidy |
| ROLAND_PG-1000_V100.zip | Alison Cassidy |
| Boehm_Dynamic_12-24.zip | Csaba TOTH |
| Kawai K4 v1.2 P206 (27C512) E5DP.zip | Csaba TOTH |
| Korg_DW8000_850709_v07.zip | Csaba TOTH |
| Korg01RW_v39.zip | Csaba TOTH |
| Orla_DSE12_eeprom.zip | Csaba TOTH |
| Quasimidi Quasar_IC4_27c1000_v200j.zip | Csaba TOTH |
| Roland_RA50_v1.01.zip | Csaba TOTH |
| Wersi_MK1_binaries.zip | Csaba TOTH |
| Yamaha TX802_XB223_XB224.zip | Csaba TOTH |
02/30/2024
Sorry for the long delayed udpate, I had some health issue over the last year or so that took me a while to recover from and my mail box filled up during that time and only just noticed that I was no longer receiving email.
| H3000 High Tide.zip | Flavio Boniforti |
| H3000SE 2.16 with SV.zip | Flavio Boniforti |
| Proteus 1 XR w Protologic - v2.30.zip | Python Blue |
| K2000ROMS.zip | SynthfulDwarphus |
| Yamaha DRC-20 - V1.20.zip | RuneGame |
12/16/2021:
Another long awaited update! Sorry again for the wait.
| Filename | Contributor |
| Casio_MT-540_Sound_Rom_Dumps.zip | John Bennett & brassicGamer |
| Yamaha SY85 IC8 1.10S.zip | Uniccoplus |
| Dynachord Add One OS-2 22B.zip | Marc Marc |
| YAHAMA PCV-87A XM456C0 27C256.zip | Fausto |
| YAMAHA PCV87A XM453C0 27C240.zip | Fausto |
| JoMoX_AirBase99.zip | Thom K. @ analogwizard.com |
| Sequential Circuits DRUMTRAKS OS v0.4.zip | Justin Mullins |
| Jen Synx 508 - Version 1.zip | Marco Molendi |
| Fernando Lachari | Emu_esi32_Firwmare3.0.zip |
| Vermona SK86 roms.zip | Andreas |
| Alesis Datadisk_v209_eprom.zip | Andreas |
| Eventide H949 Roms.zip | Stefan Huebner |
| Synthex Rev.1 Version 4 firmware.zip | Alison Cassidy |
| E-mu Proteus XR Firmware V2.03.zip | Alison Cassidy |
| Korg_X5DR_v12.zip | Kiskadar69 |
| Dynachord Add One OS-2 22A.zip | Marc Marc |
| Per Linne UC-1 Sequencer Firmware 2.0.zip | Stefan Huebner |
| DX7-V1-8.zip | Anthony |
| emu_darwin_v2_50.zip | Stu George |
| emu_darwin_v2_02.zip | Stu George |
| Kawai ACR20.zip | Runegame |
| YamahaRX15_v1-0_HN27128AG.zip | Nicolás Dinapoli Fariña |
| Yamaha-SU700-v101-103.zip | Benedict |
| DR BOHM DD BIN FILES IC104-IC120.zip | Ondrej Pavelka |
| Roland_CD-5_v3.1b_SONY_SCSI_IC802.zip | llamamusic |
| Bohm DD16.zip Bohm Digital Drums EPROM Set with 104 blue 105 red 109 red 110 blue.zip Bohm Digital Drums EPROM Set with 104 green 105 black 109 110 yellow.zip CM Labs PM216.zip Control Synthesis DB9 v2.2.zip Doepfer ms404 v1.01.zip Kenton ControlFreakLive.zip Kenton Pro dcb.zip Korg Ex8000 v850905.zip Lexicon LXP1 v1.06.zip Lexicon MRC v3.01.zip Lexicon MRC v4.00.zip Lexicon PCM70 Proms.zip Lexicon PrimeTime 93 Prom.zip Waldorf 4pole v1.48.zip |
Rob Willis |
06/04/2021:
Long awaited update! Sorry for the wait.
| Filename | Contributor |
| casio_sk5.zip | d-tech music |
| dbx_290_project1.zip | d-tech music |
| digitech_gsp5.zip | d-tech music |
| drawmer_m500.zip | d-tech music |
| dynacord_mcc1.zip | d-tech music |
| hammond_gm1000.zip | d-tech music |
| hohner_adam.zip | d-tech music |
| kawai_gmega.zip | d-tech music |
| korg_a2.zip | d-tech music |
| rocktron_progap.zip | d-tech music |
| roland_ra50.zip | d-tech music |
| roland_xp10.zip | d-tech music |
| sony_dps-d7.zip | d-tech music |
| sony_dps-v55.zip | d-tech music |
| sony_dps-v77.zip | d-tech music |
| tc_triple-c.zip | d-tech music |
| yamaha_avs10.zip | d-tech music |
| yamaha_cvs10.zip | d-tech music |
| yamaha_dd55c.zip | d-tech music |
| yamaha_psr40.zip | d-tech music |
| yamaha_psr79.zip | d-tech music |
| yamaha_pss102.zip | d-tech music |
| yamaha_pss680.zip | d-tech music |
| yamaha_ry30.zip | d-tech music |
| Moto Midi Timepiece AV USB 1.32.zip | Garry Hughes |
| Akai_MPC60_V1.12.zip | zwukolow |
| Akai_MPC60_VOICE_1.0.zip | zwukolow |
| Solton_Arranger_Plus_Rhythm_EEPROMs | Flavio |
| Eventide_H3000.zip | Flavio |
| Eventide H3000SE 2.16 with SV.zip | Flavio |
| Eventide H3000 High Tide.zip | Flavio |
04/02/2021:
| Filename | Contributor |
| Oberheim_OBXa_Firmware_Rev_9.zip | Falk |
| Peavey SX.zip | Andreas Markusen |
| Peavey SPM SP - 1.20.zip | Andreas Markusen |
06/04/2021:
| Filename | Contributor |
| casio_sk5.zip | d-tech music |
| dbx_290_project1.zip | d-tech music |
| digitech_gsp5.zip | d-tech music |
| drawmer_m500.zip | d-tech music |
| dynacord_mcc1.zip | d-tech music |
| hammond_gm1000.zip | d-tech music |
| hohner_adam.zip | d-tech music |
| kawai_gmega.zip | d-tech music |
| korg_a2.zip | d-tech music |
| rocktron_progap.zip | d-tech music |
| roland_ra50.zip | d-tech music |
| roland_xp10.zip | d-tech music |
| sony_dps-d7.zip | d-tech music |
| sony_dps-v55.zip | d-tech music |
| sony_dps-v77.zip | d-tech music |
| tc_triple-c.zip | d-tech music |
| yamaha_avs10.zip | d-tech music |
| yamaha_cvs10.zip | d-tech music |
| yamaha_dd55c.zip | d-tech music |
| yamaha_psr40.zip | d-tech music |
| yamaha_psr79.zip | d-tech music |
| yamaha_pss102.zip | d-tech music |
| yamaha_pss680.zip | d-tech music |
| yamaha_ry30.zip | d-tech music |
| Moto Midi Timepiece AV USB 1.32.zip | Garry Hughes |
| Akai_MPC60_V1.12.zip | zwukolow |
| Akai_MPC60_VOICE_1.0.zip | zwukolow |
| Solton_Arranger_Plus_Rhythm_EEPROMs | Flavio |
| Eventide_H3000.zip | Flavio |
| Eventide H3000SE 2.16 with SV.zip | Flavio |
| Eventide H3000 High Tide.zip | Flavio |
04/02/2021:
| Filename | Contributor |
| Oberheim_OBXa_Firmware_Rev_9.zip | Falk |
| Peavey SX.zip | Andreas Markusen |
| Peavey SPM SP - 1.20.zip | Andreas Markusen |
11/30/2020:
Another long overdue update!
| Filename | Contributor |
| Kurzweil K2000 v3.54C (Calvin) OS Firmware ROMs.zip | Alison Cassidy |
| Alesis QS6 OS ver 1.00.zip | Evgeniy |
| Peavey DPM-SP - Version 1.47.zip.zip | Andreas Markusen |
| simmons-portakit-1.6.zip | Ray Bellis |
| simmons-portakit-1.6-oled-patched.zip | Ray Bellis |
| Yamaha EX5 - Version unknown.zip | Andreas Markusen |
| MXR 185 CONTROL 10.zip | Alison Cassidy |
| KPC2 v2.20_5336.zip | Alison Cassidy |
| Kawai K1 Firmware V1.04 P104E.zip | Armin |
| Ensoniq SQ80m voice rom 020.zip | Johnny Diggs |
| Sequential Circuits Studio 440 v150 | Anthony Lauzon |
| Sequential Circuits Studio 440 v220.zip | Anthony Lauzon |
| Sequential Circuits Studio 440 v230.zip | Anthony Lauzon |
| Sequential Circuits Studio 440_unrelease_v2.21_Source.zip | Anthony Lauzon |
| Roland HS-80 - Version 5.0.zip | Andreas Markusen |
| Ritmi-Arranger-Plus.zip | Flavio |
| OB-xa Doc and potential V8.zip | Flavio |
| PPG Wave 2.3 version 6.zip | Alison Cassidy |
| Roland_E-20_02.03.zip | Dennis Gralke |
09/12/2020:
I'm very excited for this update as we are adding our first dump coming from a vintage Soviet synthetizer! I must admit I am personnaly very interested in old Soviet gears and technology and i hope we will get more Soviet EPROM dumps in the future! Thanks to Max ''Synthhead'' for this rare treat!
| Filename | Contributor |
| Soviet_Cadans_S12_Firmware.zip | Max ''Synthead'' |
| cheetah_md16_2.06.zip | Jürgen Driessen |
09/05/2020:
| Filename | Contributor |
| ART_MULTIVERB_alpha2_EPROM_Firmware_v2.02.zip | Robin Sutcliffe |
| ART_FXR.zip | Robin Sutcliffe |
| akai mpc 2000 pad cpu rom v 1.0 am27c256.zip | Felix Bohmann |
| DKI Synergy Roms.zip | Alsún Ní Chasaide |
| behringer_dsp1424p_ultramizer_pro.zip | d-tech music |
| casio_sk-10.zip | d-tech music |
| casio_sk-2.zip | d-tech music |
| emu_proteus-2xr.zip | d-tech music |
| lexicon_reflex.zip | d-tech music |
| roland_jd-800_waveroms.zip | d-tech music |
| yamaha_playcard_216pcs.zip | d-tech music |
| yamaha_psr-160.zip | d-tech music |
| yamaha_psr-260.zip | d-tech music |
| Kurzweil K2VX Setup V5.zip | Graham Hunter |
| QS6.2_V1.0.bin.zip | Alison Cassidy |
| Korg Trident MKII - MCUs ROMs.zip | Manfred Veber |
| 360 MIDI Bass (EPROMs, alternate set).zip | Rasputin |
| Access Virus B (am29f040b_4v9).zip | Rasputin |
| Access Virus C (am29f040b_6v6).zip | Rasputin |
| Akai MPC2000XL Operation (op) ROM for panel CPU [M27C256B, 0x3267].zip | Rasputin |
| Alesis MIDIVerb (u51 27c128 MVOBJ 2-6-86).zip | Rasputin |
| ARP ProSoloist (PROM board B and C).zip | Rasputin |
| Bohm Digital Drums IC104-107 (4x2764).zip | Rasputin |
| E-mu Emax (ROMs, GALs, and PALs).zip | Rasputin |
| Emu Emax II serial EEPROM (93C06N, from 8 MB EMAX II).zip | Rasputin |
| Emu Emulator II (PROMs IC135 and 137).zip | Rasputin |
| Ensoniq EPSm v2.41 firmware (EPROM) [SCSI support].zip | Rasputin |
| Fairlight CMI (Q032 4x270).zip | Rasputin |
| LinnDrum v3.1 OS ROMs.zip | Rasputin |
| Nord Lead 1 (27c4001 or 27c040 EPROM) (2.70 is final version_ 2002-11-05).zip | Rasputin |
| Nord Lead 3 OS v1.08 (via MIDI).zip | Rasputin |
| Nord Lead 3 OS v1.20 (via MIDI).zip | Rasputin |
| Novation Super Bass Station V1.9 [27C512].zip | Rasputin |
| Oberheim OB-Xk v1r4g (mitsubishi-M5L-27128-2-u16-8415).zip | Rasputin |
| Roland D50 PCM ROMs.zip | Rasputin |
| Sequential Circuits (SCI) Prophet 2002+ (2002 plus) [v4.3B].zip | Rasputin |
| Sequential Circuits (SCI) Studio 440 SMPTE v1.50.zip | Rasputin |
| Simmons Tom Tom (32K).zip | Rasputin |
| Waldorf MicroWave II EPROMs.zip | Rasputin |
| Yamaha DX5 v6.zip | Rasputin |
| Yamaha SY77 WaveROM (IC220_8_MSB).zip | Rasputin |
07/29/2020:
I understand that we got a very rare submission today, thanks to Gaetano Marchese for sharing this with everyone!
| Filename | Contributor |
| Roland_DJ-70MKI_v01.01_IC22.zip | Gaetano Marchese |
07/21/2020:
| Filename | Contributor |
| UrsaMajor_Stargate323_EPROM_full.zip | Robert Vettel |
| Roland_XP-10_Ver1.02_96-10-11.zip | scev0la |
| Alesis Microverb 1 - 10-27-86 5c08.zip | Zack Nelson |
| Microverb 10-27-86 5c08.zip | Zack Nelson |
| Emu ESI Version 1.04 [ESI 32, 2000 and 4000].zip | Andreas Markusen |
| ROLAND_MKS7_ROMS.zip | Andreas Markusen |
| MXR 185 Drum Computer - CONTROL 11 BOOT ROM.zip | Alison Cassidy |
| Korg DW8000 1.3 AT27C128.zip | Miguel Viscarra |
| DX7_Voice_Rom2.zip | Miguel Viscarra |
* The new Ursa Major Stargate 323 is replacing the current dump that was shown to be corrupted, thanks Robert!
05/18/2020:
Sorry, this one was way overdue, but that whole world pandemic thing is really starting to cramp my synth game!
| Filename | Contributor |
| casio_cz-1_cartridges_rc-10_rc-30.zip | d-tech music |
| korg_sas-20.zip | d-tech music |
| kramer_sg-6005.zip | d-tech music |
| tc-helicon_voicelive.zip | d-tech music |
| yamaha_dsr-1000.zip | d-tech music |
| yamaha_pss-12.zip | d-tech music |
| yamaha_ydg2030_ydg2006.zip | d-tech music |
| Akai MPC60 Panel eprom OP V1-1 2764.zip | Mauro Tarelli |
| Atari Mega STE 205 ic 018-19 tms27c010.zip | Mauro Tarelli |
| Digidesign Control 24 U3-U10-U13 v108.zip | Mauro Tarelli |
| Korg DW8000 1.3 AT27c512r.zip | Mauro Tarelli |
| KORG PROPHECY 1.01 IC2-IC22 tms27c240.zip | Mauro Tarelli |
| Simmons SDS9 4.0 27128.zip | Mauro Tarelli |
| Casio SK-1.zip | Andreas Markusen |
| Arp Quadra - P8048-0214 MCU.zip | Manfred Veber |
| Digitech RP3.zip | Thibaut Joly |
| Orla Concorde 305.zip | Thibaut Joly |
| Roland Juno Alpha1.zip | Thibaut Joly |
| Roland SDE330.zip | Thibaut Joly |
| Yamaha DX11.zip | Thibaut Joly |
| Yamaha SPX90.zip | Thibaut Joly |
| Yamaha SPX990.zip | Thibaut Joly |
| Kurzweil_K2000R_GODOT_PSEUDO_GALS | Brad Boegler |
| Kurzweil_K2000R_Setup_Rom_V1_0.zip | Brad Boegler |
| Super Bass Station V1.9.zip | Zack Nelson |
If you are planning on getting all of the dumps for yourself, you are welcome to do so! But please use the following link, my bandwidth will be thanking you;)
{nomultithumb}

I recently bought Tabletop Simulator (TTS) during the winter Steam sale. For those of you who never heard of it, it is an engine allowing people to play board games virtually. It is not a game per say as there is no artificial intelligence programmed in and the software has no idea about the rules of the game played. It is more like an engine allowing you to simulate the condition of you and your friends sitting at a table playing board games. Most games are possible from classic games like Chess and Backgammon to modern classics like Clue or Monopoly. I was browsing the Steam Workshop where you can download new board game and where people can share their own creation with other users and remembered something. A few weeks before, I had found a single game piece from a game I used to love as a kid while I was at my parent's house. The game in question was The Hamburger Game and I had totally forgotten about it until that moment. It's a simple game for kids that's best described as what would happen if a board game and a memory matching game had a baby together. Upon remembering this, I went out and searched online hoping that someone had already converted my beloved childhood game but sadly, it seemed that it was not the case as I had expected. Only thing left to do was to do it myself! It also seemed like the perfect opportunity to learn the basic of 3D modelling, something I have been wanting to do for a while.
Now, the easy way to achieve this would have been to simply find or take a picture of the game board and game piece, load them into the game and use a generic square 3d model to use as a game piece but if you have read any of my past articles, you'll know that it is not my style. So I set out to recreate the game completely, not only modelling the game tiles in 3D to the exact measurement but decided I would also try to completely redraw all of the game's artwork as high resolution vector image so that the game texture would be the crispest they can be while playing the game.
First thing I had to do was to find high-resolution scan/picture of the game and all of its pieces. Considering I had only a single game tile available, I tried to find the game for sale on eBay and such but couldn't find much except a slightly more recent German edition or overpriced auction. I was lucky enough that a website called Boardgamesgeek had a few decent pictures of the game available in their database and I was able to use those as a basis for redrawing the game board. I was also able to get the higher resolution shots I was missing from a nice guy named Simon that I tracked on the Boardgamesgeek site and agreed to provide me what I needed. For this, I used Photoshop but you could use Gimp (free) or other image editing software to do the same.
Using the board scan as a template, I tried to redraw every section of the board as accurately as possible while leaving the game artwork for later.

This is not so hard as it only contains straight lines and solid coloring, the only tricky part is when you are using a picture that wasn't taken completely straight, if that is the case you won't be able to just draw over line because of the perspective. But the picture I was using was fairly straight and the only issue was trying to get everything spaced out properly.

That was the easy part. Once the board was mostly done, I turned my attention to the games artworks. My original plan was to draw the outline of each graphic the way I usually did when digitally inking my sketch on the computer, using the pen tool and carefully following each line and curve. This usually works quite well and gives nice and crisp result but it takes a really long time to do properly and I had so many artworks to redraw it would have taken ages. So I decided to try something new and do this part in Illustrator instead. I have almost never used Illustrator before and always dreaded using it as every time I tried to do anything in it, I would get confused and frustrated almost right away. It is not because it is a bad software, on the contrary! It is just so different from Photoshop that it is a bit puzzling for someone that is used to Photoshop and even the smallest task would usually turn into a frustrating battle! I mean, just take a look at the eyedropper function, something so simple work so differently between the two software. But I recently became aware of the Live Paint feature of Illustrator and figured it might be my ticket to a quicker conversion.
I started by isolating the artworks by removing their background and went to experiment with livepaint setting. It was working OK, but it was tricky to get them right and figured that the software would have an easier time if it was only working with an outline so I went back in Photoshop and did my best to remove everything except a crude outline. I then tried to livepaint them and, just as I was expecting, it worked much better.

You could still see some jagged line and weird bump here and there at first but I was able to smooth things out by carefully using the Blur and Path fitting option. For the one that were more problematic and were more jagged, I was able to adjust them by removing or adjusting a few anchor points from the path to round off curve and straighten jaggy line.
You can only appreciate the difference by looking at them before and after.

Now we have a crisp and defined vector image of our character's outline. We could paint it in Illustrator but Illustrator is not the best for this from what I read. I tried but I would need to add different shadings/gradient and Illustrator doesn't seem to be made with those kinds of things in mind so I transferred to Photoshop to complete the coloring process. I also kept copies a copy of the black outline since we will be needing them later on to recreate part of the game board.
I started by trying to match the base color and paint every section with a solid color.The artwork placed at the center of the game board was the easiest as it only contained solid coloring with no shading whatsoever but the drawings found on the board had would take more work and consideration to duplicate their look.
Once I was satisfied that I had matched the base colors to the best of my ability with what I saw on the game pictures, I started adding the different shades to the artwork paying attention to try and make sure I stay as close to the original drawings as I could. For this, I used a combination of the Dodge tool, the Burn tool and the Airbrush tool with a lower opacity level. The Burn tool was used to darken color, the Dodge tool for lightening color and the airbrush to create shading of a specific color. I isolated the part that I was working on by using the magic wand so I could only impact the specific area I was working on and tried to duplicate the original shading as much as I could so the artwork original look would still be present in the redesign.
You can see the different stage of this process down below. The image with the color removed doesn't really show it at this size, but the edge are very pixelated with leftover colored pixels against the outline just like the tracing comparison I showed you before. It would look terrible if we were to use it to recolor our artwork!

You can see the result, the first picture being the original image I was working with and the rightmost one the one that was completely redrawn/colored/shaded on the computer. Now, it might not look like much but the one on the right will look very nice and clean even if you completely blow it out of proportion or if you zoom on it very close while playing the game.
Once every element was digitally redrawn, it was finally time to transfer them to our digital game board. This is the fun part as you will see your hard work take form right before your eye!

The next part I had to tackle for this project was to recreate the game tiles and pieces. The player pieces were pretty standard and I was able to find them already made but the game tiles needed some attention to do properly. I could have loaded the artwork on a flat game token model already included in the game but where's the fun in that? Plus, I wanted it to be recreated as accurately as I could, so modelling those pieces was the way to go. Now, I must warn people that I have zero experience nor knowledge about 3D modelling so the way I worked for this part is really not the most efficient. Even without 3D modelling skill, I felt confident I could figure it out and succeed considering the relative simplicity of the part.
I tried multiple 3D modelling software to try and find the right one for a quick start and ended up using 123d Design and Blender, two free software. 123d Design seems to be more geared toward 3D printing and is linked to their shapeway 3d printing service. I usually have a strong dislike of using that kind of proprietary software that is tied to a specific service but in this specific case, I found it the easiest to use to create my model and it allowed me to export it as an .STL file which would allow me to edit it later on in other modelling software. I then used Blender to finalize things. I could (and I should've) have used Blender exclusively for this task but I found it to be extremely confusing and not intuitive at all, which seem to be the norm for professional 3D modelling software so I only used it to finalize what I couldn't do in 123d design.
I started by taking measurement of the single-game tile I had in my possession using my trusty micrometer and used those information to create a base model in 123d design.

I then added the rounded corner of the pieces and also created the center hole of the pieces.
Once I was satisfied with my model, I needed to test and see if it was working in Tabletop Simulator. It seems that TTS only support loading .OBJ and 123d design does not let you export model as a wavefront OBJ file so I exported it as an .STL file and used Blender to create a .OBJ file. There's also a few online converter that seems to be able to convert to the different 3d model file format.
Armed with my new OBJ model, I loaded it in Tabletop Simulator, crossed my finger, and.... My model was all curvy and messed up. Huge disappointment!

I researched and read that model need to be triangulated to work properly in TTS. So I figured how to triangulate with Blender, re-exported my model, loaded it again in TTS and.... the same issue. I tried so many different thing, exporting with a different 3D modelling software, trying to see if there was any mesh issue, etc. Nothing would work. I tried to get some help on the TTS forum on Steam and peoples had suggestions about properly triangulating and edge splitting the model but again nothing worked until someone suggested that it might be caching issues in TTS. The default option in TTS is set to cache game files so that you don't have to redownload texture for games every time you want to play them. It was my issue all along. I kept fixing the model and re-importing it in game but the game would use a local cached copy of the original un-triangulated models. Once the option was turned off, my model finally appeared in all its glory. It was way too big and was falling endlessly by the game table though. It seems that it would not take the measurement I originally entered in 123d design, it might have been lost during the exporting process. You can fix that by either scaling your model in Blender or scaling it directly in TTS by selecting it and pressing + or - but not the ones near the numpad on your keyboard, only the one near the backspace will work for this. As for the game falling out endlessly by the side of the virtual table, the issue was that the model's center point was changed during the exportation. Repositioning it in Blender and re-importing it in the game fixed this.
For those that have issues finding how to triangulate model in Blender like I did, you can find in the modifier section on the right side of the screen (wrench icon).

Now that we have a working 3D model, we need texture for it. What we want to do is create the UVunwrap of the model which is basically a 2D map for how the texture will be applied to your model. To do this, I went in Blender, selected my model and pressed the Shift key to enter edit mode, activated the composite view so I could see both the 3d model view and the texture windows and finally clicked on the Mesh button on the 3D view section, selected UVUnwrap and then UVUnwrap again.

The texture map should appear in the texture windows. Once I had this, I went and exported it as a .PNG image by clicking on the UV button found in the texture windows and selecting Export UV layout. This is basically the surface of your 3D model unfolded in 2D that you will be using so the software can figure out which part of your texture part should apply to which surface of your model. We can now use this as a template to create our tile's texture. In order to figure out which surface was which, I edited the texture, put numbers on each surface and loaded it in the game. This way, I could see which part of the unwrapped texture was the top, bottom and I could then edit the texture and add our artwork using Photoshop. The following pictures show that process but for the game box model.


We could now load our new textures in TTS and see how they come up. It is important to state that, as of now, Tabletop Simulator only let you import custom texture and models with a URL, which means that you have to find a host to hold your file. This is really less than ideal and many people upload to free online file storage and they regularly get deleted.

All in all, I am extremely pleased with how everything turned up and I can confidently say that this should be the best recreation of The Hamburger Game we will get for a long time:0 The only things I am not happy with (and I might revisit in the future) is the fact that I couldn't find a copy of the instructions of this game's edition and had to substitute a shorter version with text mostly borrowed from a description on Board Game Geek I must say that I enjoyed this project quite a lot and probably invested way more time in this than warranted but I can definitely say that it won't be my last board game digital recreation. In fact, it gave me a new project idea, so stay tuned for this!
And if you own Tabletop Simulator and are interested in playing the game, you can subscribe to it on Steam Workshop by clicking here!
Update: 2026-02-12:
Over the years, several peoples contacted me telling me they were tying to recreate their own boardgame and asking for graphics files. So for those who would like to try and print their own version of the game (since it has gotten so rare and expensive), here are the recreated assets you can use. Everything you need to print the box, board and pieces should be there along the 3D model for the tile piece.
I also uploaded the 3D model for 3D Printing at thingiverse. If any modification is made, the latest version would be over there
A while ago, I made a reproduction cart of Energy Breaker using the then recently released fan translation by Disnesquick. I wanted to have a profesionnal looking label printed for a North American SNES cart shell but nothing was available at that time so I made my own. I figured it could be useful to others so here it is. Great care was given to make it as high-res and profesionnal looking as possible which wasn't so easy considering what I had to work with (mostly old scan of japanese magazine's ads). Let me know if you use it or what you think of it! I would have wanted to show how it looked once applied to a cart but i seem to have forgot to take a picture of it.
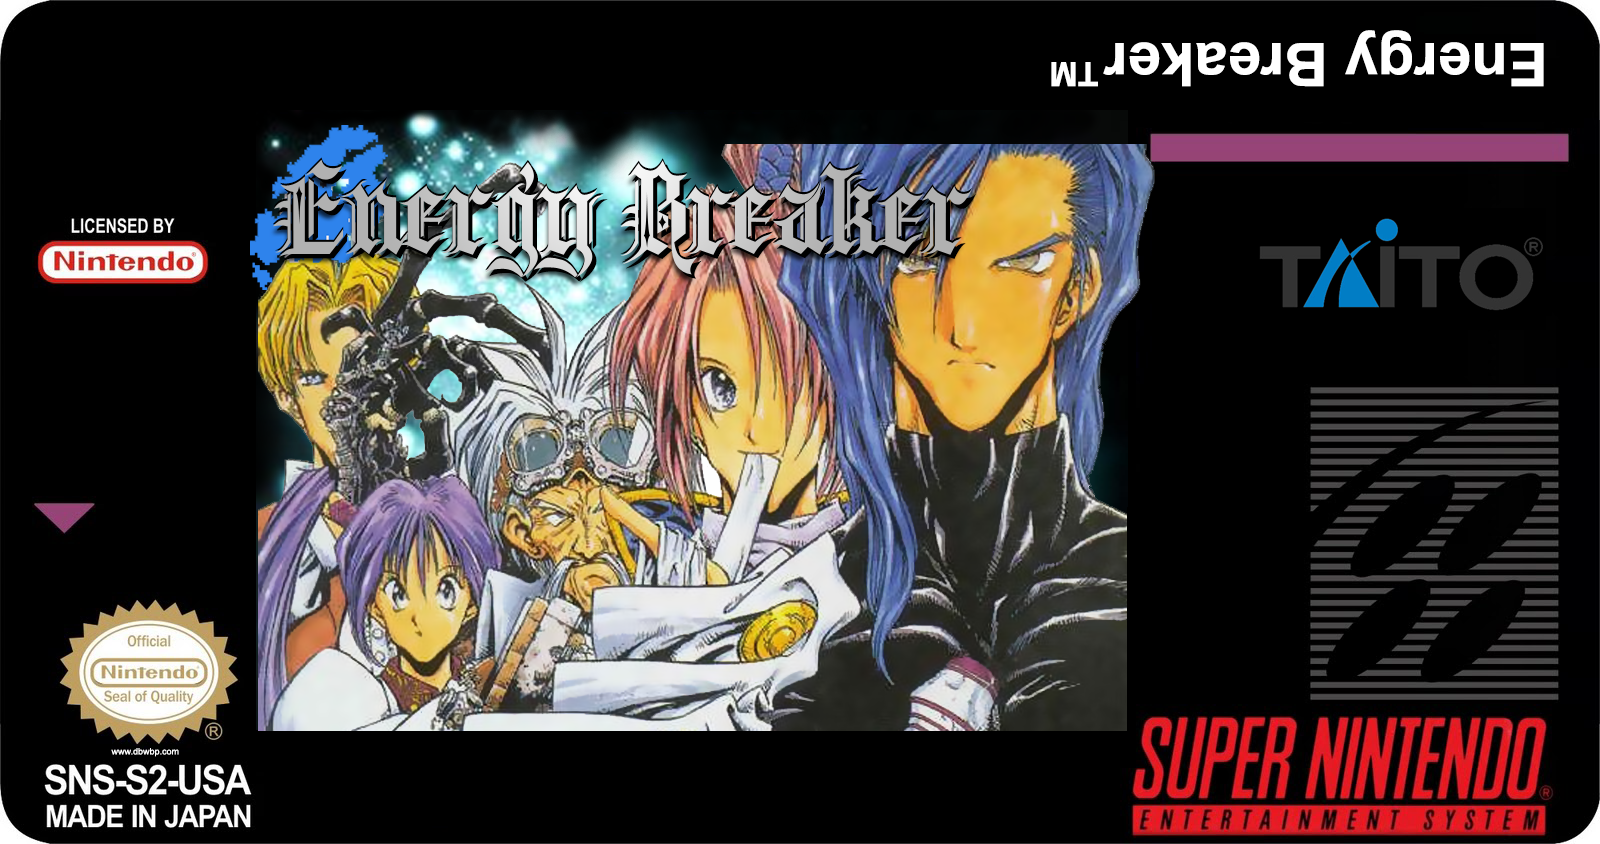
Be careful and make sure to properly line up the center of the purple line where the label fold to the top of the cart so the part where the front picture cut won't show up on the top of the cart.
And for those who would like to try the game, you can find the latest translation patch at http://eb.yuudachi.net/. I haven't played the game much yet, but it's a really great looking game released in an era where 16-bits Japanese RPG where at their peak on the Super Nintendo. The fan translation patch also appear to be very polished and feel like a professionnaly made translation.
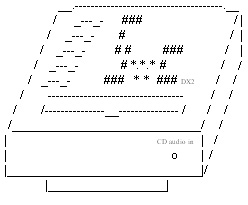
Back when I was a young geek in 2001, I bought a Super Wild Card DX2 SNES backup unit with money I saved from selling stuff on ebay. It was before video game flash cart became available and a copier/backup unit was the only way to play ROMs without emulating them on a computer so I was fairly estatic about the prospect of playing everything without any emulation glitch or innacuracy! A backup unit also would let you backup your cart and transfer their ROMs file to your copier. But information about that kind of obscure device was hard to come by for english speaker at that time so I hanged out constantly at an old backup unit message board called Red #9 (I made a partial mirror of it here). I ended ended up writing a document covering the SWC DX2. I had already made it available in the Misc. section of the site but It wasn't that easy to find and I figured an HTML version of it would be parsed by Google and make it more accessible if anybody happened to still be interested in those old cosole copier. Keep in mind that I was about 16 years old when I wrote this, I had way less technical knowdledge and I wasn't used to write in english. Also, a lot less was known back then about Super Nintendo special chip and such compared to now but most of the information should still somewhat be relevant even today. I am putting it up there mostly to make the information available again and do not really think I will be updating the information in it (most links would be dead by now except for the software section).
 THE SUPER WILDCARD DX2 FAQ V1.3
By Fat_Mike (AKA SkinnyV) Released: August 28th 2001 Last Updated: January 8th 2003
|
This FAQ was written for the purpose of helping Super WildCard DX2 owners to get the most out of their unit. It is also supposed to help those of you who are new to the backup unit world. If you have a problem that isn’t listed in this document, be sure to e-mail me. If I, or someone, manage to solve it, I will add it in the next update of the FAQ with the proper credits given.
And this is about the Super WildCard DX2, so if you are using another SNES backup unit, the information given in this FAQ are darn useless to you.
When I talk about the SWC DX2, I refer to the Super WildCard DX2 (in case you didn’t know). And English is not my native language, so there might be grammar errors and such (even though the FAQ was corrected). If you don’t understand something or want me to correct something, again be sure to e-mail me (This email address is being protected from spambots. You need JavaScript enabled to view it.)!
For those who are totally new to the copier world and don’t know what the hell I’m talking about, a Super WildCard is a Super Nintendo backup unit. With a SWC DX2, you can copy your game cartridges and play these copies (ROMs) without the need of the actual cart. You can also play a downloaded ROM image directly on your SNES just like the real cartridge. And there’s far more the SWC DX2 can do, but I can’t list all the possibilities of this copier, it would take a while.
Also, all the programs mentioned in this FAQ will be available for download from a server listed at the end of this file.
You can distribute this doc freely without notifying me as long as you don’t modify it in any way. But it would be cool to send me a message if you put it on your web site or something like that.
Now, without further notices, let’s start!
CONTENTS
1.1 Super WildCard DX2 specs
1.2 Power supply specs
2.1 Floppy Drive
2.2 DiskDual
2.3 Zip Drive
2.4 PC to SWC DX2
3.1 PAL/NTSC codes
3.2 SRAM checks
3.3 SlowROM codes
4.1 Checksum
4.2 Header
5.1 inSNESt
5.2 SNESTool
5.3 ucon
5.4 Killem
5.6 SMC
5.7 GoodSNES
6.1 DSP
6.2 SFX
6.3 SA-1
6.4 S-DD1
6.5 C4
6.6 PLGS
6.7 List of unplayable games
7.1 Game-related problems
Q1: Blank screen after loading a ROM
Q2: ROMs from foreign countries don't want to work
Q3: Graphics in a ROM are all screwed up
Q4: Game X is not working
Q5: Error when loading a ROM from the disk drive
Q6: Games won't stay in the SWC DX2 memory
Q7: How to put a game bigger than 1.44megs onto a floppy
Q8: Games freeze up
Q9: Games resetting at a certain point
Q10: How to use the DSP adaptor or passthrough cart
Q11: Problems in good Checksum ROMs
7.2 PC to SWC DX2 transfer problems
Q1: Game displaying a weird loading time in VGS
Q2: Blank screen when resetting with the cable connected
Q3: Error message when sending a ROM to the SWC DX2
Q4: Problems dumping ROM/SRAM from the SWC DX2 to the PC
Q5: Problems tranferring a particular game with VGS
Q6: Swap Disk D error
Q7: Screwed up dumps
Q8: Transfers with VGS don't work
Q1: Zip Drive doesn't work
Q2: Zip 250
Q1: Setting up the DiskDual
Q2: DiskDual doesn't work
Q3: Listening to Audio CDs using the DiskDual
Q4: DiskDual/PC communication
Q5: DiskDual won't communicate with the drives
Q6: HDD limitations
Q7: DiskDual chipset
Q1: Disk drive making weird noise
Q2: Disk drive won't work
Q3: Screen Flickers when loading a ROM from the disk drive
Q1: SRAM won't save
Q2: Saved game doesn't appear in the game
Q3: How to back up SRAM onto other media
Q4: Real Time Save doesn't work
Q5: Real Time Save data gets erased
Q1: Converting Emulator SRAM to SWC DX2 SRAM
Q2: Removing intro
Q3: BS ROMs
Q4: NP ROMs
Q5: SFX carts & Super Game Boy won't work on top of SWC DX2
Q6: Applying IPS patches
Q7: Using DOS utilities under Windows 2K/NT
7.8 Questions about the SWC DX2 in general
Q1: Does the SWC DX2 come with any tranferring utility?
Q2: Does SNESTool support the SWC DX2?
Q3: Do ROMs stay in the SWC DX2 memory when the SNES is off?
1.1 Super WildCard DX2 specs
The SWC DX2 DX2 is manufactured by Front Far East. Here are the specs as stated in the instructions manual:
- Built-in Floppy Drive
- FC9304-JSI SMT core chip
- 32Mbits or 64Mbits program memory (DRAM)
- 4M BIOS ROM
- 1K NRAM (user settings)
- 256K Battery backed-up RAM (SRAM)
- High-speed I/O serial communication port (for PC/SWC DX2 communication)
- Bi-directional parallel port
1.2 Power Supply specs
Some SWC DX2 owners will have to buy a power supply because some Super Nintendo control decks aren't powerful enough to run a disk drive. If this is your problem, you will have to go to your local Radio Shack or any other electronics store and buy a universal power supply.
Let's say that the thing below is the DC plug of the SWC DX2.
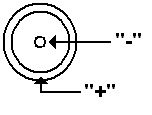
Or, viewed from the side:

The center pin is the "-".
The metal tab beside it is the "+".
The voltage is 9V-12V as stated in the DX2 instruction manual. You should use a power supply with about 1-1.2 Amp. Each power supply I tried that supplied at least 9V DC (=Direct Current, as opposed to Alternating Current/AC !) and had the polarity shown above worked fine with my SWC DX2.
2. Transfer Methods
2.1 Floppy Drive
The built-in floppy drive is used to load/save games from/to a disk and to save SRAM data (game save), RTS (=Real Time Save) data and cheats. It’s not complicated, you put the game on a disk and pop the disk in the SWC DX2. If you want to save a game to disk which doesn’t fit on a single floppy, you will have to split up the ROM. I will explain that later. But if you have an 2.88 drive lying around, you can use since the SWC DX2 support it.
2.2 DiskDual
The DiskDual is an external enclosure with room for a standard ATAPI CD-ROM drive and for an IDE hard disk drive. You can even plug it to your computer to transfer data from and to the hard disk and CD-ROM drives. You have to plug the DiskDual into the connector right besides the DC jack on the back of your SWC DX2. The connector is labelled “Parallel Port” or “DISKDUAL/ZIP” on some newer units. This is very convenient because you don’t need to split up the ROMs to make them fit on a floppy disk. Instead, you can buy a CD containig many ROMs (or burn it yourself) and play them right away. And you can use the hard drive to save your games ! The only disadvantage about it is the price of the unit... It costs about US-$90 (without shipping/bank fees!) and you have to buy the hard disk/CD-ROM drive yourself, they’re not included in the package! I don’t think it’s the best solution for someone with a small budget, but if you have the cash it is a very nice thing to have. It might be possible to connect another parallel CD-ROM/HDD enclosure and use it with your SWC DX2, but I have never heard of anybody who tried this. If you want to try it, be sure to buy a unit that uses the same parallel to IDE converter as the DiskDual. It’s a Kingbyte KI3020A converter.
2.3 Zip Drive
An external Zip Drive can be used in the same fashion as the DiskDual. You plug it in the same connector as the DiskDual and you can load games that you have stored on Zip disks (100 MB). But be careful : the new Zip Drive with 250 MB capacity won’t work with the SWC DX2, and the new version of the 100 MB Zip Drive won’t work either. Only the old Zip Drive 100 MB will work with the SWC DX2.
2.4 PC to SWC DX2
This method is used to send games from your computer to the SWC DX2. It is done with a utility made by Front Far East called VGS. You can also use SNESTool to send the ROMs. You have to plug a DB25 male to male connector cable from your PC printer port to the connector labelled “COM I/O port” on your SWC DX2. Then, using VGS, you send the ROM to the SWC DX2 and play it. How to use VGS will be explained later.
Nintendo used many kinds of protections in their games in attempt to stop piracy and video games from being copied. I will try to explain what these protections do. Additionally, I will explain how to easily fix them using one of the many utilities stated in the above section. If you are using a SWC DX2, however, there shouldn’t be any problems because the SWC DX2 can handle these protections found in SNES games quite well.
3.1 PAL/NTSC codes
This protection was used to prevent people from importing video games. The game verifies wich video system you use, and if your video system doesn’t match the one that the cartridge was supposed to be played on, you will get a “This game pak is not designed for your Super Famicom or Super Nes” type of message. This is the only protection that you will have to crack in order to play the ROM on a SWC DX2.
3.2 SRAM checks
SRAM checks were used e. g. in the Donkey Kong Country series. I don’t know of any other games that use that kind of protection. What this protection does is quite simple but efficient. The game checks the SRAM chip size when you power on your SNES. If the SRAM is 64Kbits (the SRAM size of DKC), the game starts, but if the SRAM chip is smaller or bigger than this, you will get a “Copying video games is naughty” type of message. Since the standard SRAM size of backup units is 256Kbits, you will need to remove SRAM check codes using inSNESt or ucon, but only if you are using an older backup unit because the SWC DX2 can handle SRAM checks in any ROM so that these games will work even if you haven’t removed the SRAM check protection codes.
3.3 SlowROM codes
Ok, SlowROM is definitely not a protection, it was only used by Nintendo to get the most out of the SNES (but since people who own an older backup unit might have problems with that, I’d better add it in this section). SlowROM is not a problem with the SWC DX2, either. This copier handles these checks flawlessly. You can still remove them, though, if you are experiencing any problems playing the ROM on your backup unit by using one of the many programs available. The protection is based on the ROM access speed. Newer games use 120ns insted of 200ns. Old 200ns ROMs are considered SlowROMs and newer 120ns one are FastROMs. So, if you’re using an obsolete backup unit that plays the ROM at 200ns only, you will not be able to play or backup FastROM games. But like said before, the DX2 is a master handling SlowROM as well as FastROM codes.
4.1 Checksum
This is for those of you who really don’t know a thing about all this Checksum thing. You’ve probably heard that you have to download ROMs only with good Checksums but you just don’t know what we’re all talking about. So, I will try to explain what a Checksum is to make you understand why you should try to search for good Checksum ROMs.
In each ROM, there is a number at a certain hex offset which is two bytes long. This number indicates what all the bytes in the ROM should sum up to. With a special utility, you can calculate the ROM’s Checksum and see if it is a good one. The program calculates the actual Checksum of the ROM and then compares it to the one written in the ROM. If the two numbers are the same, then your ROM has a good Checksum, if the two numbers are different, then your ROM has a bad Checksum.
What can change the Checksum of your ROM, you ask then? Well, many things will screw the Checksum up in a ROM. If someone changes any byte in the ROM code, the Checksum will change. Even if you rename the internal game title, the Checksum will be bad and even removing a protection code in a ROM will change its Checksum. Also, the Checksum will become bad if you patch a ROM. A bad Checksum can also mean that the ROM has not been properly dumped. A ROM with a good Checksum means that the ROM hasn’t been altered or modified in any way and has been properly dumped. A ROM with a bad Checksum can have problems or graphical glitches when played. Many bad Checksum ROMs don’t, but you should try to have good Checksum ROMs to be sure nothing will be screwed up in the game. But those problems are not directly the result of the Checksum. Checksums only exist to let you know if something is not like it was supposed to be. Computer programs can also have a Checksum. Your computer BIOS does have one, too. If you find the offset where the Checksum is stored in your ROM and change it, you'll still have a perfectly good dump. It is just there to let you know that the original file was like that.
As mentioned above, there is a utility to recalculate a Checksum in a ROM so it’ll display a good Checksum. This is silly because if people hack their bad Checksum ROMs to display a good Checksum, the internet will be full of bad Checksum ROMs and there will be no way to verify if the ROM is a bad dump or not. It’s great that GoodSNES exists, we will talk about this program later. Also, hacking the ROM’s Checksum will do absolutly nothing! If the game has graphical glitches in it or if it freezes up at a certain point, the ROM will still have these problems even if the Checksum has been hacked. Remember, a good Checksum dooesn’t always mean that it’s a good dump; the ROM could have been hacked.
If you are a Checksum hacker, go to jail without stepping on the “GO” case and pass 3 turns.
4.2 Header
Now, what the hell is a header? The header is a 512 byte long character string added to the beginning of a cartridge dump by the copier to identify what the specifications of the ROM are (if the game is HiROM, LoROM, if it has SRAM etc.). The backup units or emulators use this information when you load the ROM to know if it needs SRAM and so on. The header is not the same depending which backup unit you used to dump the game. Sometimes, with japanese or translated ROMs, you even need to repair it. Depending on the game, you’ll have to choose whether the game is HiROM or LoROM and if it has SRAM. With the Super WildCard DX2, you will encounter a couple of different file extensions. They are:
*.RTS = Real Time Save data
*.BBD = Battery Backup Data (SRAM)
*.SWC = Game Program (ROM)
*.PAS = Password file
Only *.RTS, *.BBD and *.SWC have a header at the beginning. The backup unit will know if it’s a ROM, an SRAM or a Real Time Save file depending on the header. E. g. byte #10 of the header will determine what kind of a file it is. If byte #10 is $04, that means that the file is a Game Program (ROM), but if byte #10 is $05, that means that the file is a Battery Backup Data (SRAM) and $O6 would be a RTS file. BTW, the $ only means that the number is a hexadecimal (hex) value (in case you didn’t already know). There are many other things in the header, but they are listed in the instruction manual of the SWC DX2, so there’s no point in re-writing them...
I will make a description of some SNES utilities that SWC DX2 owners should have. But there are MANY other utilities. I’ll only list the ones I use and prefer.
5.1 inSNESt
This is THE utility for SWC DX2 owners - the swiss knife of SNES utilties. With this little gem, you can do whatever you need to do to your ROMs. You can view internal ROM informations, convert a ROM to a specific copier type, split a ROM, join the splited parts of a ROM, rename the internal ROM name, fix NTSC protections to make the ROM work on PAL systems, fix PAL protections to make the ROM work on NTSC systems, remove SlowROM protections, fix a game with SRAM protection(s), apply IPS patches to any ROM, pad your ROM to a valid Mbit size and create a list of your SNES ROMs! inSNESt can also hack a bad Checksum (CRC) ROM (see section #4.1). You should go download it right now if you don’t have it. Watch out for the new version coming out soon!
5.2 SNESTool
SNESTool is a great tool to have. With it you can split/join your ROMs, apply and create IPS patches as well as remove SlowROM protections, PAL/NTSC protections, remove intros, convert ROMs between some formats, add/delete headers and the most useful: repair headers. If you want to play a ROM (mainly after patching) and you get a blank screen when trying to play it on your SWC DX2, you will need to repair the header (that was the solution of 90% of my problems to play some translated games on my SWC DX2!).
With SNESTool, you can even send your games to your SWC DX2, but only LoROM games. And I love the easy-to-use GUI. You don’t have to enter a 2 feet long command line from the DOS prompt to modify your ROMs - just start the utility and make your selection with the arrow keys on your keyboard.
Remember, if you want to remove PAL protections you have to click on ”NTSC fix”! And if you want to remove NTSC protections you have to click on ”PAL fix”! If only SNESTool had a great conversion feature like inSNESt...
5.3 ucon
ucon can do many things like convert between image formats, apply baseline (*.bs1) patches (I have never encountered any needs to use them since they were only used a long time ago), apply IPS patches, rewrite headers, join split files, create an MGH name file (but since we’re talking about the SWC DX2, no need for that), show ROM information, pad a ROM’s size, split files, fix SlowROM/PAL&NTSC/SRAM protections... It has many other options for the Genesis that we (SWC DX2 owners) don’t really need. I use inSNESt to do all that. You should do so unless you absolutely want to use ucon. :)
5.4 killem
I don’t use that program much, but it can remove SlowROM and PAL protections. You are given the option to make an IPS patch to remove the protection, so you can give the patch away (assuming e. g. your friend doesn’t have a computer) or use it for yourself in order to leave the ROM unchanged.
5.5 VGS
VGS is the official transfer program made by Front Far East. If you want to connect your SWC DX2 to your PC, you will need to use it to send the games to the SWC DX2’s DRAM (the unit’s ROM storage area), to backup or restore your SRAM or to backup your games directly to your PC. The utility is very easy-to-use, so I don’t need to explain it in all ist details. There are other transfer programs out there (made by some hardcore fans) but you’d better use VGS. If you press F1 while a game is selected, you will be able to see ROM information. There is also an updated version made by Russell O’Quigley, you should download this one because Russell corrected many VGS problems. He even added a test function to it, but unfortunately, this option doesn’t work on every PC (if you want to access it, press F11). But his updated version works damn well and almost all the VGS problems have been corrected. He even added a Checksum calculator! Big thanks to you, Russell!
5.6 SMC
This is used to verify the Checksum of any of your ROMs and to view the information about a ROM. It is quite simple to use. It’s a very useful utility because it gives you all the information available about a game, like if it uses a special chip or SRAM etc... Yet, I personally think it’s more convenient and easier to verify the Checksum with the Checksum calculator Russell added to VGS.
5.7 GoodSNES
This program rules! With this you can rename all your ROMs to their official title, and it will make a list of the ROMs you have and how much you still need to have all of them. But the best part of this utility is that it detects if a ROM is a good dump or a bad dump (even if some evil person hacked the Checksum). I use GoodSNES everytime I download a new ROM. It is very useful, you should download it because everyone who downloads ROMs should have it.
6. List of special chips games
6.1 DSP chip
The DSP chip is a math coprocessor, and, like all the other special chips, it was used to do things that the normal Super Nintendo hardware couldn't do (like the rotating sprites in Pilotwings e. g.). There are more than one version of this chip. The DSP1 speeds up the SNES up to 7.56Mhz. The chip was produced by NEC and contains Nintendo's own custom code. There is also another DSP chip but this one was made by SETA with their own code. It has built-in SRAM for battery backup. The only game it is used in is SETA's "Exhaust Heat 2". SWC DX2 utilities detect this chip as DSP2, but it seems that Nintendo has a DSP2 chip too! I've discovered that by opening my Dungeon Master cart. So there must be at least three types of DSP chips. There might be even more but I can't verify that unless I find some carts that use the DSP chip and open them. Same thing goes for many of the games listed here. I can't be sure of what chip they use until I open the actual cart. In order to be able to play DSP1 games (DSP stands for Digital Signal Processor, by the way) you will need to buy a special DSP cartridge or find a game cart that uses the same DSP chip as the ROM you want to play, and use it as a pass-through cart. However, you can't play a DSP2 game using a DSP1 cart. Whether the game can be played with the DSP adaptor or Mario Kart as the pass-through cartridge will be determined by an X on my list. If you found error, be sure to e-mail me! Note: If I put an asterisk (*) after the DSP type, that means that I opened the cart to verify which DSP chip it uses. If there is none, that means that I had not the chance to open the cart and the DSP type was only verified with SMC. If I didn’t opened a particular cart but the game is known to be playable using Mario Kart as the passtrough cart, the asterisk will be there since that means that the game uses the same chip as Mario Kart. There might be different versions of the DSP1 chip; Pilotwings is a DSP1 game and it can’t be played with Mario Kart. But if you apply a patch to Pilotwings, you will be able to play it using Mario Kart! This patch is available on the files server.
DSP games list:
| Title | Will run with DSP Adaptor | Will run with Mario Kart | Chip used |
| Ace wo Nerae (J) | [X] | [X] | DSP1* |
| Armored Trooper Votoms (J) | [X] | [X] | DSP1 |
| Ballz 3D (J) | [X] | [X] | DSP1* |
| Ballz 3D (US) | [X] | [X] | DSP1* |
| Battle Racers (J) | [X] | [X] | DSP1 |
| Drift King Shuto Kou Battle 2 (J) | [X] | [X] | DSP |
| Dungeon Master (E) | [\] | [\] | DSP2* |
| Dungeon Master (J) | [\] | [\] | DSP2* |
| Dungeon Master (US) | [\] | [\] | DSP2* |
| Exhaust Heat 2 - F1 Driver heno Michi (J) | [\] | [\] | DSP2SETA |
| F1 Roc 2 - Race of Champions (US) | [\] | [\] | DSP2SETA |
| Final Stretch (J) | [X] | [\] | DSP1 |
| Korean League (K) | [*] | [*] | DSP |
| Lock ON (US) | [X] | [X] | DSP1* |
| Michael Andretti.s Indy Car Challenge (J) | [X] | [X] | DSP |
| Michael Andretti.s Indy Car Challenge (US) | [X] | [X] | DSP |
| Pilot Wings (E) | [X] | [X] | DSP1* |
| Pilot Wings (J) | [X] | [X] | DSP1* |
| Pilot Wings (US) | [X] | [X] | DSP1* |
| Planets Champ TG 3000 (J) | [\] | [\] | DSP1 |
| SD Gundam GX (J) | [X] | [\] | DSP1 |
| Super 3D Baseball (J) | [\] | [\] | DSP |
| Super Air Diver (E)(NGDK) | [X] | [\] | DSP1 |
| Super Air Diver (J) | [X] | [\] | DSP1 |
| Super Air Diver 2 (J) | [X] | [X] | DSP1* |
| Super Bases Loaded 2 (US) | [*] | [*] | DSP1 |
| Super F1 Circus Gaiden (J) | [X] | [X] | DSP |
| Super Mario Kart (E) | [X] | [X] | DSP1* |
| Super Mario Kart (J) | [X] | [X] | DSP1* |
| Super Mario Kart (US) | [X] | [X] | DSP1* |
| Suzuka 8 Hours (J) | [X] | [X] | DSP1* |
| Suzuka 8 Hours (US) | [X] | [X] | DSP1* |
| Syutoko Battle Racing 2 (J) | [\] | [\] | DSP |
| Syutoko Battle Racing 94 (J) | [X] | [X] | DSP |
| Top Gear 3000 (E) | [\] | [\] | DSP4 |
| Top Gear 3000 (US) | [\] | [\] | DSP4 |
Legend: [X]= Will run with [\]= Will not run with [*]= Can't get past the protection screen, not sure if the game is playable or not [ ]= Un-Tested
6.2 SFX chip
The SFX chip is a processor that companies added to their cartridge to speed up the Super Nintendo processor. With this special RISC processor (Reduced Instruction Set Computing), game could do very impressing stuff that the Super Nintendo processor would have never been able to handle, like displaying many polygons on the screen (e. g. StarFox/StarWing). With this coprocessor, the SNES ran at about 10.5Mhz insted of 3.58Mhz.
The SFX2 is a boosted version of the SFX chip. With it, the SNES runs at 21Mhz. But the SFX2 consists of 2 chips working together at 10.5Mhz each. They are used in a couple of games, and there are only 2 variations of this chip. Also, you won’t be able to play SFX games using the real cart on top of your SWC DX2, but refer to the Misc. Questions & Answers section if you want to know how to mod your SWC DX2 connector to be able to play SFX games using the real cart. But unlike DSP carts, you can’t use a cart that uses a SFX chip as a passtrough cart for playing SFX ROMs.
6.3 SA-1 chip
The SA-1 is another enhancement chip. The core of this chip is a 65xxx compatible processor running at 10.5Mhz. It is almost the same chip used for the SNES CPU but with added features like memory mapping, real-time timers, DMA mode (Direct Memory Access) and some very fast RAM. Even the lockout chip is included in this monster. The ROM data can't be accessed until the SA-1 has verified the lockout chip of the Super Nintendo. This is why some games like Super Mario RPG could not be dumped until recently. The copier couldn't have a good dump of the ROM because of this chip that would prevent the game data to be dumped properly. You can verify this by inserting a SA-1 game on the cartridge connector of your backup unit and try to check the game information. You'll see that everything is screwed up. This chip was used in some of the late SNES releases like Super Mario RPG, Kirby's Dreamland 3 and in a bunch of SNES games released only in Japan.
6.4 S-DD1 chip
This is a graphics compression chip. Very little is known about this chip. The game data is compressed and decompressed by the S-DD1 chip. If you don’t understand, think of a compression program like WinZip - the S-DD1 is used to do almost the same thing. This is why a zipped ROM file (assuming the ROM uses this chip) retains aproximatly 90% of its initial size! That is because the ROM data has already been compressed. Ok, this is quite more complex than Winzip but you got the point.
None of the games that use this chip can be played on any emulator because nobody knows the decompression algorithm of the chip. That means that the game data isn’t decompressed and all the game’s GFX are screwed up. If you want to see by yourself, try loading Street Fighters Alpha 2 in your favorite emulator. The game will be played but you’ll see a bunch of colored pixels everywhere. But you will be able to play Star Ocea on Zsnes with the graphics pack released not so long ago, but this is not emulated, it's a little bit like cheatings but you can play it anyway. The game data has to pass trough this chip in order to be accessed by the Super Nintendo (just like with the SA-1). That means you can’t back up the game properly just like games that use the SA-1.
6.5 C4 chip
The C4 chip is a special graphics compression chip made by Capcom. Very few things are known about this chip. It was used to produce better graphics and special effects in their games. It is only used in Megaman X2 and Megaman X3 as far as I know.
6.6 PLGS
A PLGS chip is a Real Time Clock chip. It was used in very few japanese RPGs. This chip makes the game being played in real time. What I mean by ”real time” is that if it’s night for the player, it will be night in the game. You set up the clock at the beginning of the game by entering the date and the current time. Then, the game will evolve with these settings. If you decide to play the game at 2AM, then it will be night in the game too. Or, special events only happen at a particular date etc... I know only 2 games that use that chip: Far East Of Eden Zero and Dai Kaijyu Monogatari 2. But you can still play Dai Kaijyu Monogatari 2 on your SWC DX2 even though it uses a PLGS chip.
6.7 SPC7110
This is another custom GFX compression chip. Far East Of Eden Zero use that special chip. If you try to load Far East Of Eden Zero on your DX2, it will display a diagnostic screen and you will not be able to play it. Again, not much is known about this chip.
6.7 Un-playable games list
Here’s a list of games that are unplayable on the SWC DX2 (or any other backup unit) at the moment. I’ve heard that an SFX adaptor exists, but I’ve never seen one. Also, I will not list different version numbers of a game since if one version contains a chip, all the other versions will use it, too.
Unplayable games list:
| Title | Chip used |
| Asahi Shinbun Rensai Kato Hihumi 9dan Shogi Shingiryu (J) |
SA-1 |
| Augusta Masters 3 New World Golf (J) | SA-1 |
| Bass Fishing No.1 (US) | SA-1 |
| Daisenryaku Expart WW2 (J) | SA-1 |
| Derby Jockey 2 (J) | SA-1 |
| Dirt Racer (E) | SFX2 |
| Dirt Trax SFX (E) | SFX2 |
| Dirt Trax SFX (US) | SFX2 |
| Doom (E) | SFX2 |
| Doom (J) | SFX2 |
| Doom (US) | SFX2 |
| Dragon Ball Z - Hyper Dimension (F) | SA-1 |
| Dragon Ball Z - Hyper Dimension (J) | SA-1 |
| F-1 Grand Prix (J) | SA-1 |
| Far East Of Eden Zero (J) | SPC7110 |
| Honkakuha Igo Gosei | SFX |
| Hoshi no Kirby 3 (J) | SA-1 |
| Hoshi no Kirby Super Deluxe (J) | SA-1 |
| Idaten (J) | SA-1 |
| Igo Daidou (J) | SA-1 |
| Jikkyou Oshaberi Parodius (J) | SA-1 |
| J-League .96 Dream Stadium (J) | SA-1 |
| Jumpin. Derby (J) | SA-1 |
| Kakinoki Shogi (J) | SA-1 |
| Kirby Superstar (US) | SA-1 |
| Kirby.s Dreamland 3 (US) | SA-1 |
| Kirby.s Fun Pak (E) | SA-1 |
| Marvelous (J) | SA-1 |
| Masoukishin - Super Robot Wars Gaiden - Lord of Elemental (J) | SA-1 |
| Mega Man X 2 (E)(NGDK) | C4 |
| Mega Man X 2 (US) | C4 |
| Mega Man X 3 (E) | C4 |
| Mega Man X 3 (US) | C4 |
| Metal Combat (US) | OBC1 |
| Mini 4ku Shining Scopion Let.s & Go! (J) | SA-1 |
| Pachisuro Palusupe (J) | ?? |
| Pebble Beach no Hato 2 - New Tournament Edition (J) | SA-1 |
| PGA European Tour (US) | SA-1 |
| PGA Tour 96 (US) | SA-1 |
| Power Rangers Zeo - Battle Racers (US) | SA-1 |
| Pro Kishi Simulation Kishi no Hanamichi (J) | SA-1 |
| Rockman X 2 (J) | C4 |
| Rockman X 3 (J) | C4 |
| SD Gundam GNext (J) | SA-1 |
| Shogi Club (J) | SA-1 |
| Shogi Mahjing (J) | SA-1 |
| Shogi Saikyou 2 (J) | SA-1 |
| Star Fox (J) | SFX |
| Star Fox (US) | SFX |
| Star Fox 2 (Beta) | SFX2 |
| Star Fox Competition - Weekend Edition (US) | SFX |
| Star Ocean (J) | S-DD1 |
| Star Wing (E) | SFX |
| Star Wing (G) | SFX |
| Street Fighter Alpha 2 (E) | S-DD1 |
| Street Fighter Alpha 2 (US) | S-DD1 |
| Street Fighter Zero 2 (J) | S-DD1 |
| Stunt Race SFX (E) | SFX2 |
| Stunt Race SFX (US) | SFX2 |
| Super Bomberman Panic Bomber World (J) | SA-1 |
| Super Mario RPG (J) | SA-1+DSP |
| Super Mario RPG (US) | SA-1+DSP |
| Super Shogi 3 - Kitaihei (J) | SA-1 |
| Super Shogi 3 - Kitaihei (J) | SA-1 |
| Table Game Daisyugo - Shogi Mahjong Hanafuda (J) | SA-1 |
| Takemiya Masaki 9dan no Igo Taisyou (J) | SA-1 |
| Vortex (E) | SFX2 |
| Vortex (J) | SFX2 |
| Vortex (US) | SFX2 |
| Wild Trax (J) | SFX2 |
| Winter Gold SFX (E) | SFX2 |
| Yoshi's Island (E) | SFX2 |
| Yoshi's Island (J) | SFX2 |
| Yoshi's Island (US) | SFX2 |
*(NGDK) means "no good dump known"
I will try to answer some commons questions about the SWC DX2 here. This section should help new users getting through several problems. If you encounter a problem not listed here, be sure to send me an e-mail with a detailed explanation and if I or anybody else manages to solve it, I will add it to the list of answered questions.
7.1 Game-related problems
Q1: "I tried to load a ROM but I only get a blank screen. What can I do?"
A1: This happened to me a few times, but mainly with japanese ROMs and ROMs that have been patched like English or other translations. Try to repair the header using SNESTool. Then you should have no problems running the game. If it still doesn’t work, check for any other protections using inSNESt. If everything fails, try to download the ROM from another source because it might be a bad dump.
Q2: ”I tried to play a PAL ROM and I encountered a message saying that the game pak wasn’t designed for my system... What should I do?"
A2: First, if the game you want to play is a PAL game and you are using an NTSC system, perhaps it is PAL-protected. Try to search for PAL codes using SNESTool or inSNESt. After removing the protections, the game should work fine. But don’t make the same mistake as me! When trying to remove PAL codes with SNESTool, be sure to click on ”NTSC Fix” and not on ”PAL Fix”. If you click on ”PAL fix”, SNESTool will tell you that the ROM has been patched 01 times, but the game will work no more at all! You have to click on ”NTSC fix” at the beginning.
Damn, I downloaded Terranigma from all sources available in order to find a working dump, but only at 3AM I finally found out what I was doing wrong... But if you want to play an NTSC game on a PAL system and that kind of message appears, do the same thing but search for NTSC codes. Click on ”PAL fix” in SNES tool. You should have no problems after doing this.
Q3: ”I want to play the game X but the GFX is all screwed up, what can I do?"
A3: Well, there isn’t too much to do. There are good chances that the ROM you are playing is corrupted. The only solution is to find a good dump of the game you try to play. Scan your ROM with GoodSNES to see if it’s a good dump.
Q4: ”Why the hell does game X not work on my backup unit?"
A4: All the games are different and there is no magic wand to fix all the games that are not working. You should try to search for protection codes using one of the utilities explained in the Useful Utilities section (#5). Personally, I use inSNESt for that kind of operation. But be sure that the game you want to play does not use any special chip because this could be the reason why it doesn’t want to work. Check if the game you’re trying to play is on my list of Unplayable games (#6.7) to be sure.
Q5: ”I tried to load a ROM from a disk and get an ‘Error!’. What is the problem?"
A5: Ah, the first time I tried my SWC DX2, I got this error so many times that I thought my SWC DX2 was broken. This is just because the ROM on the disk is corrupt or most likely because the disk you are using itself has some bad sectors or errors. 3/4 of my floppies were full of bad sectors and this is why my ROMs wouldn’t load. If this is the problem, try to scan them using Scandisk. Sometimes, it’ll repair the errors or mark bad sectors not to be used by any disk operating system. The best solution for this problem (if it’s not the ROM itself) is to buy a new fresh pack of floppies! :)
Q6: ”How can I store games in the SWC DX2? I lose them every time I power off my SNES."
A6: Well, you can’t keep games in the SWC DX2 DRAM memory. Even if you use a power supply, the games will be gone as soon as you power off your SNES.
Q7: "How can I put a ROM bigger than 1.44MB on a floppy disk?"
A7: With the SWC DX2, you can format your floppies to 1.6MB (the Explorer program under Windows will display 1.5MB), but if the game still doesn’t fit on the disk, you will have to split the ROM. This is done by many SNES utilities. I recommend using SNESTool because of the cool GUI. After splitting, you will have some files named *.1, *.2, *.3 etc. This is your ROM - split into many parts to make them fit on floppy disks. All you have to do is putting the different parts of the ROM on as many disks as you need, and load the first file using your SWC DX2. When the first file is loaded, you’ll be prompted to insert the next disk, until your game is fully loaded into the SWC DX2 memory.
Q8: "I play a game and it always freezes at a certain point. What is the problem?"
A8: Most likely, the problem lies within the ROM itself. You might have a bad dump. Scan the ROM with GoodSNES to see if it's a bad dump. Or, try to download the ROM from another source.
Q9: "My game is always reseting; what can I do?"
A9: The ROM you are using is probably a bad dump. Download it from somewhere else and it should work well.
Q10: "How do I use the DSP adaptor to play my DSP ROMs? I heard I can use Mario Kart as a passthrough cart; is this true?"
A10: Yes, this is true. You can use it as you'd use the DSP adaptor. You load your ROM normally. After it is loaded, put your DSP adaptor or DSP dummy cart into the catridge slot of your SWC DX2 and reset your SNES. Now the game should run normally (well, assuming your DSP adaptor or your DSP dummy cart contains the same DSP chip as the ROM you are trying to play).
I tested many DSP ROMs with many different dummy carts and I discovered that you can't play all the DSP ROMs using a dummy cart or DSP adaptor. Sometimes, games that appear to have the same DSP chip as your DSP cart will not work. E. g. I tried to play Dungeon Master using Mario Kart as the passtrough cart and it didn't work. I can't even play this ROM using the real cart as passtrough cart! :(
Q11: "My roms are always screwed up, even the ones with good Checksum, what is the problem?"
A11: A good Checksum does NOT mean that this is a correct dump or a "clean" ROM. Scan the ROM with GoodSNES to determine if it's a bad dump or not and if it is, try to download the game from a website or files server you trust.
7.2 PC to SWC DX2 transfer problems
Q1: "I tried to send a game using VGS but the loading time shows something like 167754 or another weird loading time. Am I supposed to wait for that amount of time or what?"
A1: The game needs to be damn good to make the long waiting time worth playing it! :) No, seriously, this is very easy to fix. I bet you are trying to play a ROM which is not in the Super WildCard format. And sometimes this is because the ROM header is corrupt. Try to convert the ROM to the Super WildCard format using inSNESt. The header will be fixed during the conversion. Or, you just repair the header using SnesTool. After that, try to send the ROM to the SWC DX2, it should display a normal loading time and load correctly.
Q2: "After playing a game tranferred from my PC using VGS and powering off and on my SNES, I get a blank screen insted of the SWC DX2 menu! What can I do?"
A2: You have two options here. You can disconnect the parallel cable and power on your SNES and reconnect the cable. But I don't recommend this option because it is very annoying. You can use the new version of VGS which corrects many of the transfer problems like this one. Sometimes you'll have to deal with the blank screen even though the new version of VGS, but this is rare and you better thank him for doing a damn good job correcting the problems in VGS! ;)
Q3: "I can't send my SRAM Data to the PC using VGS, or I cannot dump my cart directly to my PC. What's the problem?"
A3: This is another problem in VGS. When VGS is used on some computers, you can't send data from the SWC DX2 to the PC. Thanks to Russell, we are now able to fix that problem. All you have to do is download his updated version of VGS. He corrected this problem. Russell is really DA MAN!
Q4: "I transferred a game into the SWC DX2 memory using VGS, but when I power on my SNES system, the game is not there. What am I doing wrong?"
A4: You are not transfering the game in the correct way! :/ In order to transfer a ROM to the SWC DX2 with VGS, you have to connect a DB25 male to male cable between your SWC DX2 and your computer, power on your SNES and send the game when the SWC DX2 menu is at the screen! The scrolling background should be slowed down by the transfer. When the game is loaded, the screen should go black and the game should start.
Q5: "I tried to send a game using VGS, and I only get a `Swap Floppy D' error. What can I do?"
A5: Try to convert your ROM to Super WildCard format, it should send it without any problems after that.
Q6: "I dumped a game using VGS but the dump is bad. The dump has not the valid size or the Checksum is incorrect. What is the problem?"
A6: This is because of some bugs when doing SWC DX2 to PC transfer in the last version of VGS. I encountered this problem only with two particular games. Russell O'Quigley managed to fix this annoying problem in his last version of VGS. A quick fix would be to dump the game on floppy, zip disk or HD (depending what you use/prefer) instead of transferring it directly to your PC using VGS. Yet, you better download the new VGS available on my files server!
Q7: "I can't tranfer anything with VGS; am I stuck loading games with floppys for eternity?"
A7: Are you using a laptop computer to connect to your DX2? Because yes, you should try with another computer because the parallel port voltage of laptop computer vary depending on the model. Also, you should check what cable you are using for transferring games, because some cables won't work. Your best bet would be using your scanner cable for transfers (in case you have one). I never had a problem with my cable, but the cable I use is a scanner cable. :) Or, ask for a DB25 male to male switchbox cable at your favorite computer or electronics store. According to Tony from the Red #9 message board, his PC to SWC DX2 tranfer problems were gone when he used a cable made by a company called "BELKIN". The part number is F3D111-06, so you could check for a similar cable at an electronics store in your area.
Q1: "I have connected my Zip Drive to my SWC DX2 but it doesn't want to work!"
A1: Check if you have connected your Zip Drive to the right port of the SWC DX2 (labelled "Parallel I/O"). And be sure your Zip Drive is not the new version of the Iomega Zip Drive because Iomega changed something in their newer model so that it doesn't work on the SWC DX2. Only the old version of the Zip Drive works with the SWC DX2.
Q2: "I plugged my Zip 250 to my SWC DX2 and it doesn't work. What's the problem?"
A2: Sorry, but the new Zip 250 does not work with the SWC DX2. Only the old version of the Zip Drive 100 will work.
7.4 DiskDual problems
Q1: "How do I set up my DiskDual?"
A1: First, unscrew the shield of the DiskDual and remove it. If you use a CD drive and a HDD together, be sure to change the jumpers accordingly. Configure the drive that is at the end of the IDE cable as "Master" and the other one as "Slave". If you only use one drive with your DiskDual, connect it to the end of the IDE cable and put no jumper at all (or configure it as "Cable Select"). Now take your CD drive or your HDD, put them in place and plug the IDE cable and the power cable to your drive. Screw them in and when everything seems to be ok, plug the power cord in a wall socket and connect your DiskDual to your SWC DX2. Be sure that the power switch of the DiskDual is OFF before plugging the power cord into the socket. Now, test the DiskDual by trying to acess your drive with your SWC DX2. If everything works, you can put the shield back on the DiskDual and screw everything back. If it doesn't work, re-check everything.
Q2: "Why the hell won't my DiskDual work?"
A2: Verify if you've plugged it in the right port. You have to plug the one end of your cable into the port labelled "To System" (on the DiskDual) and the other end into the port labelled "Parallel I/O" or "Parralel Port" (on the SWC DX2). And don't forget to plug the DiskDual's power cord before trying to use it! However, if you think the problem is related to your HDD, check the HDD limitation part of the DiskDual Q&A section; that might help you.
Q3: "The SWC instructions manual says that I can listen to Audio CDs with the DiskDual. How can I do that? There is no sound when I press Play in the CD option of the SWC!"
A3: You have to plug the four pins CD cable in the little four pin connector inside the DiskDual AND you must connect the Audio plug on the back of the DiskDual to the little "Audio In" port on your SWC DX2. Now you should hear your music when you press Play.
Q4: "How can I connect the DiskDual to my PC for tranferring stuff?"
A4: You have to connect the one end of a DB25 male to male cable with the port labelled "To Printer" on the back of the DiskDual and plug the other end to your PC's parallel port. Now, you have to install the DiskDual's drivers on your PC. You can download the required drivers from my files server.
The file name is: KI3020.ZIP
Q5: "I have installed my HD and CD-ROM drives in the DiskDual, but I get an `!Error' whenever I try to use them; what the hell is that?!"
A5: Verify if the DiskDual is connected with the correct port. The DiskDual needs to be connected via its port labelled "To System" to the port labelled "Parallel Port" (or "Parallel I/O") on the SWC DX2. If the problem still occurs after the verification, try to see which jumper setting your drives use and verify if these settings are correct. If your HDD is on the Master connector of the DiskDual's ribbon cable, then you have to set the jumper on your HDD to "Master". Same thing with the CD-ROM drive. If the CD-ROM is on the Slave connector of the DiskDual's ribbon cable, then you have to verify that the jumper is set to "Slave". You can look up the different jumper configurations in your drives' documentation booklet or sometimes even on the drive itself. And if everything fails, try with no jumper set at all.
Q6: "What is the size limit for the partition of HDD with the DiskDual and what kind of HDD should I use with it?"
A6: (This part comes from John Weidman; he sent me this by e-mail and he explained it so well that I have just copied&pasted it in here. So, credits for this one go to him, thanks alot John!)
"The IDE disk that goes in the DiskDual will only recognize up to 4095 (I think) cylinders. When looking for a disk to put in the DiskDual, I would recommend either a smaller HD (2GB or less) or a HD with a cylinder limit jumper on it (because large drives don't work in the DiskDual without it). I use a Maxtor 10GB drive with the cylinder limit jumper. I have seen a number of Maxtor drives that have the cylinder limit jumper although it is not listed in the pamphlet that accompanies the drive, you have to download the jumper info from the Maxtor website (www.maxtor.com). I have seen one other recent drive brand that has the jumper but I can't remember the manufacturer. Most new drives don't seem to have them - check before buying. The DiskDual will only be able to use the first 2GB of the disk but the rest can be used by the PC using the supplied driver. I formatted my disk in the PC and then copied my ROM files to the DiskDual in the PC because this is much faster than the parallel port on the DiskDual. Once all the data was on the disk, I put it in the DiskDual.
Important notes: If you want to format your HDD in the PC running Win 9x, you need to format and copy files in `Shut down to MS-DOS' mode which is NOT the same as a DOS box in Windows! Select `no' to large disk support in Fdisk!"
Q7: "I want to build something that will connect to my SWC DX2, and I'm wondering which chipset the DiskDual uses."
A7: The DiskDual's IDE to parallel converter uses the KI3020A chipset from Kingbyte; hope that can help you in your project!
Here's a link from the Kingbyte website about this particular chipset: www.kingbyte.com/product/ki3020aa.htm
Q1: "My disk drive makes a weird sound when I'm loading a game from a floppy. What can I do to make it stop?"
A1: It seems that your SNES is not powerful enough to run the disk drive. You will need to buy a power supply. Check in the specs section of the FAQ (#1.2) to know what to buy exactly.
Q2: "My Disk Drive seems to be broken; is there a way to change it?"
A2: First, try to test the Disk Drive using the SWC DX2 self test function. If the test fails, by all means do not panic! Open your SWC DX2 (there are only two Philips screws to remove, but be careful not to tear up any wires!) and check the ribbon cable connector of the Disk Drive. The connector might be slighty disconnected. If this is the case, connect it tightly and when you are sure everything is OK, put back the casing of your SWC DX2 and proceed to the Disk Drive test. If the test still fails, you should start to realize that the Disk Drive is broken. You can test it in your computer and see if it works. When you are sure that the disk drive is broken, change it. It's very easy, by the way.
All you have to do is to find a new disk drive (they're very cheap and easy to find these days). Now, open your SWC DX2, locate the old disk drive, unscrew it, disconnect it, remove it, connect the new one, put it in place, screw it in, and close your SWC DX2. Now you should proceed to the Test function to see if the new disk drive works. If you don't have a spare one and you absolutely need one to play your SWC DX2, you can always take the one in your PC temporarily. Who uses the Disk Drive anyway? ;) Or you can use the PC to SWC DX2 transfer method because loading games from floppy gets old very quickly.
Q3: "The screen flickers when I load a game from the disk drive. Why?"
A3: This is also a power supply problem. Refer yourself to question #1 of the Hardware problem section, or proceed directly to section #1.2.
Q1: "My SRAMs are not being saved. What's the reason?"
A1: Try to test the SRAM using the self test function of the SWC DX2. It could be the battery backup which could be dead. If you think it is the case and your backup unit is one of the old ones and was never used with a power supply, try to use and power supply and the battery will probably re-charge. But before doing that, check if you really can't save in ALL the games you have, because if it's only one game that doesn't want to save, then you should try to patch your ROM with the savefix.ips patch (if you are using a Double Pro Fighter) or try to download the ROM from another source. I have never encountered a ROM which needed this patch since I don't own a Pro Fighter, but if you do, download the patch from my server, and apply it to your ROM using SNESTool.
Q2: "I played a ROM for many hours on my SWC DX2 and then I saved my game and sent the SRAM to the computer or floppy. When I restore my SRAM on the SWC DX2 and load the ROM, my saved game does not appear in the saved games menu!!! Do I have to restart all over from the begining?"
A2: This happened to me a few times but only with trained ROMs. All you have to do is to find the non-trained version of your ROM. After, you should have no problem with the saved games menu not displaying your game.
Q3: "How can I backup my SRAM onto other media?"
A3: Simple. Go to the "WildCard OS" menu and select "Battery SRAM manager". Choose "Backup to" and then select the medium where you want to store your SRAM. You can also back up your SRAM with VGS; you just have to press F5 and give it the file name you want.
Q4: "I tried to play game `X', but I can't use the Real Time Save feature of my SWC DX2 with it. What's wrong?"
A4: Real Time Save does not work with all SNES games. Like stated in the instruction manual, it works with about 90% of the games. It's because some SNES games require to have the music synchronized with the gameplay. I tried it on some games and it seems that RTS will not work on the Star Wars series and will screw up sometimes with Super Castlevania IV. I also had problems playing Nosferatu using the Real Time Save, because the game would freeze when loading the RTS data.
Q5: "I've saved my game using the Real Time Save feature of the SWC DX2, but when I powered on my SNES, the save data wasn't in the memory anymore; am I doing something wrong?"
A5: Yes, you are doing something wrong. Real Time Save data, unlike SRAM data, is NOT kept in the SWC DX2 memory. Everytime you power off your SNES, you will lose the RTS. If you want to keep your RTS data for future play, you need to back it up before powering off your SNES. You have to return to the DX2 menu by pressing L+R+Start when playing your ROM, and go to the "WildCard OS" menu. There, select "Real-time save manager". Now you select "Backup to" and choose the medium you have/prefer. You can also back up your RTS with VGS; you just have to press F9 and name the RTS data file.
Q1: "Is there a way to convert a SWC DX2 SRAM file to make it playable on an emulator, or convert an emulator's SRAM file to make it playable on the SWC DX2?"
A1: Yes, and this is quite a simple task. SWC DX2 SRAMs contain a 512bytes header at the beginning. All you have to do to make your DX2's SRAM work on an emulator is to delete that header. Just open SNESTool, select "Delete Header" and the SRAM file you want to use. That's it! Mostly, the DX2's SRAM data files are four times bigger than the emulators' SRAM files, but don't worry about it.
And vice versa, if you want to use your emulator's SRAM on your DX2, just copy it to a disk and load it via the SRAM manager in the "WildCard OS" menu. Note that it'll say "File length error", but who cares - it'll have the SRAM loaded anyway! :)
There is also a program called SRAMConv that converts SWC DX2 SRAM files to emulator SRAM, but it doesn't convert emulator SRAM to SWC DX2 SRAM. And it is easier to do the conversion with SNESTool, I think.
For those of you who are interested, here's what the header of a SWC DX2's SRAM file looks like (in hex values):
0000000000000000AABB05000000000000000000000000000000000000000000000000000000000000000000000000000000000000000000000000000000000000000000000000000000000000000000000000000000000000000000000000000000000000000000000000000000000000000000000000000000000000000000000000000000000000000000000000000000000000000000000000000000000000000000000000000000000000000000000000000000000000000000000000000000000000000000000000000000000000000000000000000000000000000000000000000000000000000000000000000000000000000000000000000000000000000000000000000000000000000000000000000000000000000000000000000000000000000000000000000000000000000000000000000000000000000000000000000000000000000000000000000000000000000000000000000000000000000000000000000000000000000000000000000000000000000000000000000000000000000000000000000000000000000000000000000000000000000000000000000000000000000000000000000000000000000000000000000000000000000000000000000000000000000000000000000000000000000000000000000000000000000000000000000000000000000000000000000000000000000000
Q2: "How do I remove the damn intro at the beginning of some of my ROMs?"
A2: I, too, hate to have those intros on my ROMs (even if some of them are pretty cool). I like to have "pure" dumps. They're very easy to remove. Open SNESTool and click on "remove intro" and select the ROM file. Unfortunately, this doesn't work with the Super Mario All-stars (US) dump floating around out there...
Q3: "I have seen many ROMs with BS written before the title of the games, what does the BS mean?"
A3: BS stand for Broadcast Satellite. This was an add-on released for the SNES in Japan. It was called the BS Satelaview. This was a big grey box that would plug underneath the SNES console in the "Extension" port and worked with the St-Giga satellite network. St-Giga was a normal satellite channel, but with a great feature: at certain hours, you could download games/cheats/info via the Satellite network to a special programmable cart that was plugged into a SNES cart adaptor that looks very much like the Super Game Boy. Then, you could play the game for a certain amount of time, once per week. Most of the BS-X ROMs are remakes of Nintendo games like BS-Zelda which was a remake of The Legend of Zelda for the NES but with better graphics/music etc... With the BS-X, you could also download cheats and information about your favorite SNES games. Some titles will work well on a backup unit, but some will not because they need an extra 512Kbits of memory found in the BS-X system that was used to boost the SNES a little.
Q4: "Many ROMs have NP written before the title, and what does it mean?"
A4: This stands for Nintendo Power. In Japan, you can buy a special 32Mbits programmable cart. You can send games to this special Flash Cart using a special machine found in some stores. You pay a small fee depending on the game you choose and then the machine transfers the game to the flash cart. Some games are still being produced for that Nintendo Power Cartridge. The NP before a ROM's title means that this is a game for the NP cart. By the way, you can play any NP ROM without any problems on your SWC DX2. :)
Q5: "I tried to play my StarFox/StarWing cartridge on top of my SWC DX2, but it doesn't work. My Super Game Boy does not work either. Is there something I can do?"
A5: It seems that FFE have changed the circuit of the Cart Extender on newer SWC DX2s, so some of you will not encounter this problem. But for those of you who can't play them on your SWC DX2, there are two possibilities.
The first is to remove your Backup Unit from your SNES and plug your SFX cart or Super Game Boy in the cart connector and play it normally.
The second is to modify the SWC DX2 connector! I was too lazy to remove the SWC DX2 from my SNES so I wanted to find a way to make them work on top of my SWC DX2. I was always checking the connections inside of my SWC DX2 to find the extra pins disconnected, but they were all connected... So I stopped searching. But Matthias told me that his Double Pro Fighter connector was missing the extra pins used by SFX games etc... I was so sure that all the pins were connected in my SWC DX2 connector that I never bothered to open it until he told me that. I opened the connector and discovered that pin #1 wasn't connected to the 2nd end of the connector. For those of you who don't know, pin #1 is used for the transmission of the Super FX/Super Game Boy clock data.
So what I've done is the following: I soldered a bridge between the two ends of Pin #1. Now my Super Game Boy and my SFX carts work great on top of my SWC DX2! If you want to do it on your SWC DX2 connector, first, remove the connector cart. It fits darn tight in the SWC DX2. Press both sides together to remove it!
Then, remove the two Philips screws and open your SWC DX2 connector. You will notice that Pin #1 is disconnected. Remove a little of the green thing that is used to insulate the PCB circuits with a sharp knife (enough to solder a wire) and then perform the mod. Here is a representation of the modification:
(You could also achieve this with a conductive ink pen.)
Front of the SWC DX2 connector
X= Points to solder the 2 ends of the wire
o= Wire
|
*Disclaimer: I do not take any responsibility if you hurt yourself, fry your SWC DX2 (very unlikely since it will only affect what goes into the SNES, not what goes into your SWC DX2), destroy the White House or burn Grandma while performing this modification. This is a dead-easy mod that everyone should be able to do without problems, but if you don't know which end of a soldering iron is hot, then ask someone who knows to make the modification for you.
This mod was performed and tested successfully by Cyan, too!
Q6: "How do I apply an IPS patch to any of my ROMs?"
A7: Put the ROM you want to patch, the IPS patch and SNESTool in the same directory. Open Snes Tool and select "Use IPS". Now, select your IPS patch and choose the ROM you want to patch. SNESTool will patch your ROM and give out a message "IPS patched ok". Quite simple! :)
Q7: "How can I use any of the DOS utilities you mentioned in this FAQ if I am using Windows 2000 or Windows NT?"
A7: Having Windows 2000/NT as your OS can be a problem if you want to use all the great backup unit related utilities available (not only for backup units, but also many other things). If you want to use them, you will have to download the driver called ntdriver.zip on the files server and follow the instructions included in the ZIP file. After that, you should be able to run programs like VGS etc... without any problems. I had some troubles using these drivers, and I found out a easier solution. Just go download VMware. VMware is an utility that can load almost any OS while being on another OS, like Windows 2000. You could then use VMware to load up MS-DOS in Windows 2000/NT and use all your DOS utilities without any problems.
7.8 Questions about the SWC DX2 in general
Q1: "Does the SWC DX2 come with any transferring utility?"
A1: No, you will have to download them on the net or on my files server. You can find the URL in section #8 of this FAQ.
Q2: "Does SNESTool support game transfer to the SWC DX2?"
A2: Yes.
Q3: "Will the ROM transferred to the SWC DX2 memory stay in the memory when I turn off the SNES control deck?"
A3: No, the ROM in the SWC DX2 DRAM will be gone when you turn off your SNES, and there is no way to keep it in the memory even if you use a power supply.
8. SWC DX2 DX2 files server
This is the place to get all the programs stated in this FAQ. You will find many other SWC DX2 related files, too. Here is a list of all the things on the server, file size and a brief description of what they are. Utilities that were explained in the utilities section will not have much of a description.
Note: Almost all the files on this server are compressed; you need a program like Winzip to un-zip them. Winzip can be downloaded from www.winzip.com.
| Filename | Filesize | Description |
| GoodSNES_0_9993.zip | 166KB | GoodSNES Version 0.9993 |
| SRAMconv.zip | 117KB | SRAM converter |
| VGS.zip | 26KB | Old version of VGS |
| VGS2000.zip | 33KB | Updated VGS from 06/06/00 |
| inSNEST.zip | 48KB | InSNESt |
| hw32v31.exe | 1792KB | Hex Workshop v3.1 |
| savefix.ips | 21O | Save fix IPS patch |
| ki3020.zip | 99KB | DiskDual Drivers for PC |
| killem.zip | 4KB | Killem |
| ntdriver.zip | 864KB | Driver for Win 2K/NT |
| pilotcrk.zip | 1KB | Crack for Pilotwing |
| SNEStl12.zip | 20KB | SNES Tool |
| ucon.zip | 59KB | Ucon |
| zlib.zip | 26KB | You need this file to use GoodSNES |
| SWCfaq.rtf | 96KB | The last version of the FAQ |
Here are some cool links to have bookmarked (not in particular order):
Front Far East:
www.front.com.tw
This is the company which makes and sells the Super WildCard DX2. You can also buy SWC DX2, DiskDual and DSP adaptor here.
SNES Power:
www.snespower.f2s.com
This is my SNES ROM dumping site. Me and the other dumpers from the site will release our ROMs here. Also, this is the place to check for updated version of this FAQ.
Red #9:
www.emucamp.com/red
This is a very good page about backup units in general and you can find the best and the only active backup unit messages board around.
Cherryroms:
www.cherryroms.com
This is a very cool SNES ROM site with a pretty good message board. They have every GoodSNES ROM available for download.
One Minute Left in The Second Period:
www.oneminuteleft.com
They have a good number of ROMs here!
RiGaMoRTiS PRoDuCTioNZ:
www.rigamortis.com
The makers of inSNESt. Check there for their upcoming new version & Windows port!
Zophar's Domain:
www.zophar.net
Mostly emulation related but the board is nice.
The Whirlpool:
http://donut.parodius.com
A great translation news site with a section for translated games for many systems.
-rpgd--:
http://rpgd.emulationworld.com
A very cool news site concerning translations.
Schweino's SNES Trainers Archive:
http://home.wxs.nl/~ooste660
This is a site which carries many trainers for SNES ROMs, but if you own a SWC DX2, you don't really need them unless you want to add some cheat menus etc...
Credits:
Some information came from some Red #9 users
Many SA-1 game titles come from an old Makuchan dumps list
Originally, VGS was programmed by JSI. The updated version is by Russell O'Quigley
Some DSP titles were submitted by Matthias
The Windows 2K/NT driver and information was provided by Agent X
The crack for Pilotwings was provided by Jigsaw
A couple of DiskDual infos came from John Weidman
The space for the SWC DX2 files server was kindly provided by Sledge
Special Thanks:
First, I want to thank Cyan (This email address is being protected from spambots. You need JavaScript enabled to view it.) who was nice enough to correct all my dumb grammar mistakes, for his good recommendations, for making an RTF version of the FAQ (since my version was in Word97 format, Yuck!) and for helping me with quite a few things.
I wanna thank Mikeal (This email address is being protected from spambots. You need JavaScript enabled to view it.) for correcting the FAQ when it was still at beta stage.
I want also to thank (not in particular order):
Baramekia for being the coolest full-grown man I know, ehh.... (perhaps not cooler than Mr. T but cool anyway :) and the good friend he is.
Reek Master Of Roms for being so cool with me and for always offering me his help whenever I needed it.
Mark Knibbs for the CIC pin out he gave me, general information and for the great set of Nintendo screwdrivers!
Matthias for his great e-mail full of information.
Joe for making some tests for the DSP section
John Weidman for his corrections and his help.
Super Fly Wonder Pimp for making the great Red #9 website where I first heard about backup units.
All the users of the Red #9 board
Russell O'Quigley for his damn good updates of VGS and for having made my life so much easier when uploading ROMs to my SWC DX2! :)
Front Far East for making available the Super WildCard DX2, which is by far the best backup unit for the Super Nintendo IMO.
All the SNES ROMs hackers and translators out there who make us enjoy some damn cool games that we couldn't play or understand before.
All of you who took the time to e-mail me to give me feedback or helping me.
The guy who sold me his Super WildCard DX2 64mbits :)
All the spare time I have. Without it, this FAQ wouldn't have been possible at all!
Ok, I think I've used the word cool quite a lot...
That's it, Hope you enjoyed the FAQ as much as I enjoyed writing it.
Send me your questions, comments or feedback at this adress: This email address is being protected from spambots. You need JavaScript enabled to view it. - but please, do NOT write in "Poketard Talk". Example of some "Poketard Talk":
"Hey dudz, Whut sup? Pleaz send me cool ROMz shitz becuz i luvs gamz !!!!!!!11"
And do NOT ask me for ROMs. There are links in this FAQ you should take a look at for that kind of nasty stuff. ;)
But I appreciate receiving all kinds of other e-mails!
|
Notice: No SNES carts were hurt during the making of this FAQ |
{nomultithumb}

DBWBP.com has recently been the victim of a malicious SPAM bot script and got taken down for severals days. This was my own fault as I had some issues after my last server migration preventing me of properly updating joomla or my various extensions. The site was also also filled with unused and outdated extensions but since it was still working, I procrastinated for months and did not fix it until I was warned by my current host that my account got suspended because several hundreds of SPAM e-mails were being routed from my hosting account. Since I had so many extensions/plugin from when I was trying out stuff while building the site, locating the compromised extension proved to be tricky and the script seemed to replicate and hide itself as php file on different location on my server. Not wanting to have any parts in the SPAMMING of hundreds of peoples around the globe, I decided the best course of action was to shut it down and rebuild the site from the ground up and only keeping the bare minimum to minimize the risk of any future incidents. One thing I wanted to avoid was copying/pasting the contents of all my articles and lose all their stats (hit counts, categories, tags etc...). It was also important for me to be able to keep all the comments my visitors lefts on my differents articles. There are a few free extensions that were made to easily migrate differents type of contents but it was mainly intended for peoples migrating from Joomla 1.5 to version 2.5 or 3.x but more importantly for me, there was no way to install anything on my infected site because of some restrictions applied by my host. This left me looking around for tutorial as I was not really that knowledgeable about SQL but couldn't find much. I figured it out and ot everything and now I am going to share this bit of informations in the hope it'll help out someone someday.
The things that I needed to migrate:
Articles
Categories
Tags
Article's comment (Jcomments)
Menu entry
First, we need to extract all those informations from your old web site's SQL database. To do so, we need to access the Joomla's database using PHPMyAdmin found in your hosting account's Cpanel.

Once in PHPMyAdmin, we need to select our Joomla's database. The name of the database will be different from site to site but it is usualy named something like Joom1234 but it can be different if you had chosen to use a custom name during the Joomla installation. It should be pretty easy to find as most personnal website only have one or 2 database. Once you have located the right database, we need to expand it by clicking the little + button on the left of the database name. This will list all the different tables.

The one we are interested in are the following (the xxx part is your database's prefix and differ from site to site):
xxx_content - Joomla's article database
xxx_menu - Joomla's menu database
xxx_categories - Joomla's article categories database
xxx_tags - Joomla's article's tags
xxx_jcomments - Article's comment from Jcomments plugin
Now we need to export thoses tables. There's a way to export them all at the same time but to avoid issues and since there is only a few table, I advise selecting and export the table's entry one table at a time. Jus taking everything can cause issue when you'll be importing them in your new site as it will give error if entry are already existing in the database where it is going to be imported. This way you can select only the specific entry you need, exclude the rest and avoid issues when you'll be importing them back into your new site later. To do so, select one of the table and you'll see all the entries apear on the main windws of PHPMyAdmin.

You can then select everything and then unselect the few items that are default entry that would already exist in your other database. Once you have checked everything you want to move, you can export the mbut be sure not to click the regualr EXport button at the top of the page, you want the one at the bottom of your listed entry on the right of ''With selected:''. If you use the regular Export button at the top, it will just export every entry of that table wihtout consideration to what entry you have selected prior.

You just have to click ''Go'' on the next windows without modifying anything and it'll download a .SQL file on your computer.
Now there is a good chance that the database on your new server won't be named the same (unless you intentionnally named it the same). This is a problem because those database entries we just exported will refer to the old database prefix. Fortunatly, it is a prtty easy fix and we will be taking care of that on the next step.
To do this, we just need to open up our .SQL file in your favorite text editor. I highly recomment the exellent and free notepad++ as it is much better at formatting the text according to what it is and it is much more powerfull than your build-in text editor. After that it is just a matter of searching the file for the old database prefixe (the xxx_ part) and have the text editor replace all instance found with the new database prefix and then save the file.

We are now ready to import our entries i nthe new site database. To do so, log into the Cpanel of your new site and then launch PHPMyAdmin. Select the Joomla's database and select the table you are working on (example xxx_contents) and click ''Import'' at the top.

Select your newly edited SQL file by clicking on ''Choose file'' and then click ''Go'' and it should start importing and complete hopefully withouts issues.

If you receive one of those, it is likely that one of the entries you were trying to import was already present on the new database. Try to go back and import only the entries that are not present on the new database.
We're not done yet, unless you do not care about categories and tags. We now need to do the same process but with the categories, tags and menu table. Once you have finished importing the others tables you can log into your Joomla's backend and you should now see your old articles and hopefully your tags and categories also followed. If you get error when trying to make modification to an articles and such, you might need to go to your menu and categories manager and click ''rebuild''. It should take care of it. You will also need to reconfigure your differents menu item but that should be fairly easy.
In the case of articles comments, Jcomments, the extension I am using unfortunatly doesn't let you export/import it's own article. There is an import function but it is only meant to import comment from a different comments extension installed on the same site. So first I had to install Jcomments on my new site so that all it's table get created. Then I did the same process as for the article's database (exporting, replacing db's prefix and importing) and everything ported over effortlessly.
You can do the same with extension's settings and such. I also did this with hikashop's settings and product listing. It worked but I still need to figure out an issue with the product page not working.
Here you have it peoples, this is how I migrated my website's content without using extensions. The lessons of the story here: keep your Joomla's and extensions/plugins updated and fix issues as they arrise or you might end up harassing some poor guy on the other side of the globe about buying viagra and inheritting gazillion of dollard from a long lost relatives they never knew they had.
** Due to constant SPAM originating from the comments of this article, comments have been disabled. If you have questions or comments, you can e-mail me directly using the contact page **
{jcomments off}